SelfHoster Part 3 - Customize Plane for Whitelabel

This is Part 2 of #SelfHoster Series,
- Part 1 - Self Hosting Plane Locally
- Part 2 - Local Development Setup
- Part 3 - Whitelabel Customizations and building Docker Image
Last part, was focused on how you can setup the open source Project Management Tool locally using tools like Docker and Pnpm.
In this episode,
I am going to show you how you can customize Plane and make it yours (Whitelabel / Branding changes) and pack it to for production by creating a Docker Image.
Whitelabel ?
White-label = Frontend + Emails + Domain (that represents your brand)
You can easily replace the images / favicons
Let's modify the Logo:
If you edit this file in apps/web/core/components/auth-screens/header.tsx
 <PageHead title={pageTitle + " - Plane"} />

 <Link href="/">
    <PlaneLockup height={20} width={95} className="text-primary" />
</Link>
to
 <PageHead title={"Self Hoster"} />

  <Link href="/">
    Self Hoster
   </Link>
Building Docker Image with Changes:
So once you are done setting up, you can deploy the new changes, to do that:
Step 1: Build the image (locally)
cd plane
docker build \
	-f apps/web/Dockerfile.web \
	-t yourname/plane-space:latest \
	.

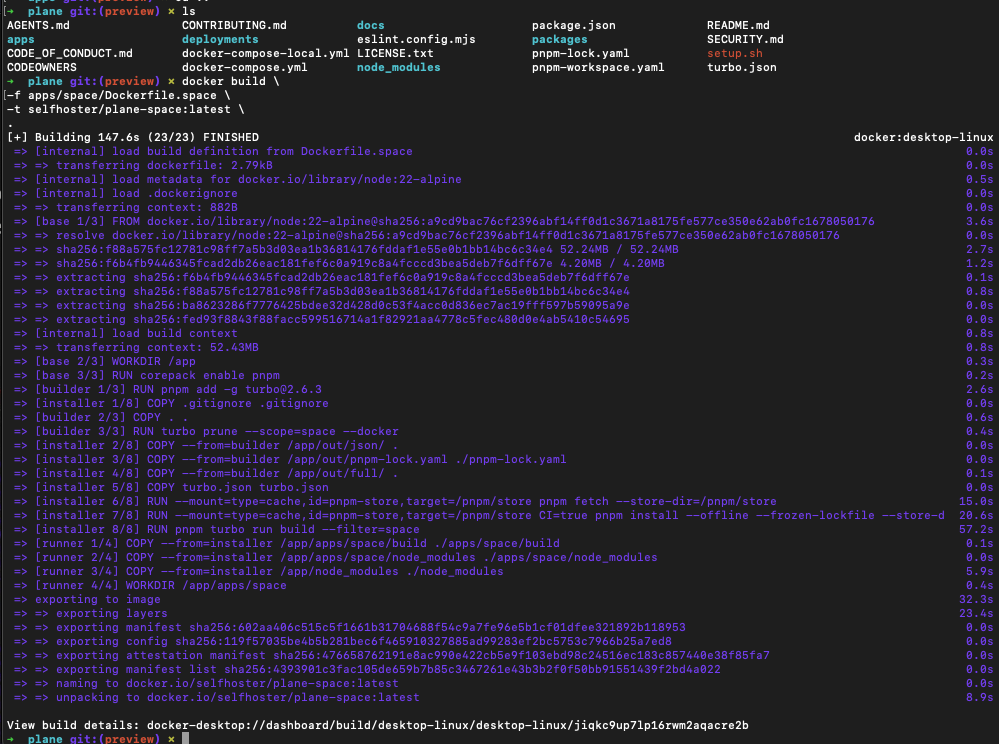
Step 2: Verify Image :
Thiw will show two images when you list images
docker images | grep plane-space

Run locally to test the changes
Run this command to run the container for latest image:
docker run -p 3000:3000 \
  -e NEXT_PUBLIC_API_BASE_URL=http://localhost:8000 \
   yourname/plane-space:latest
visit http://localhost:3000
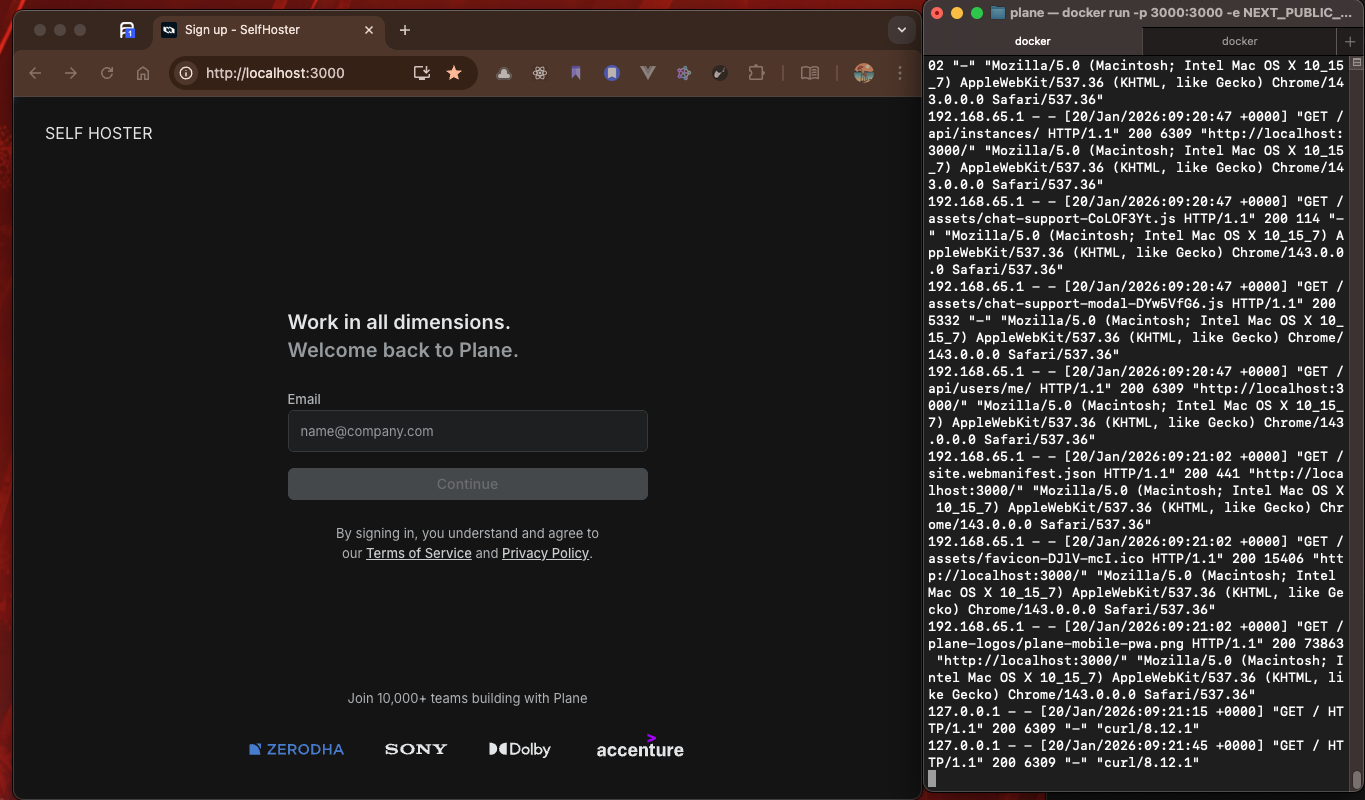
As you can see its showing SELF HOSTER instead of the plane icon
Great ! we have customized the logo and the title, similarly you can change anything !
Step 3: Push image to registry
You can use Github Container Registry or Docker Hub to push your image :
Option A - Github Container Registry :
- Save Save your personal access token (PAT) as an environment variable
export CR_PAT=<your_personal_access_token>
- Login to ghcr.io
echo $CR_PAT | docker login ghcr.io -u USERNAME --password-stdin
- Push the image:
docker tag yourname/plane-space:v1 ghcr.io/<github_username>/<yourname>/plane-space:v1
docker push ghcr.io/<github_username>/<yourname>/plane-space:v1
eg.
docker tag selfhoster/plane-space:v1 ghcr.io/sujaykundu777/selfhoster/plane-space:v1
docker push ghcr.io/sujaykundu777/selfhoster/plane-space:v1

Test if its pushed
Go to this url https://github.com/yourusername?tab=repositories

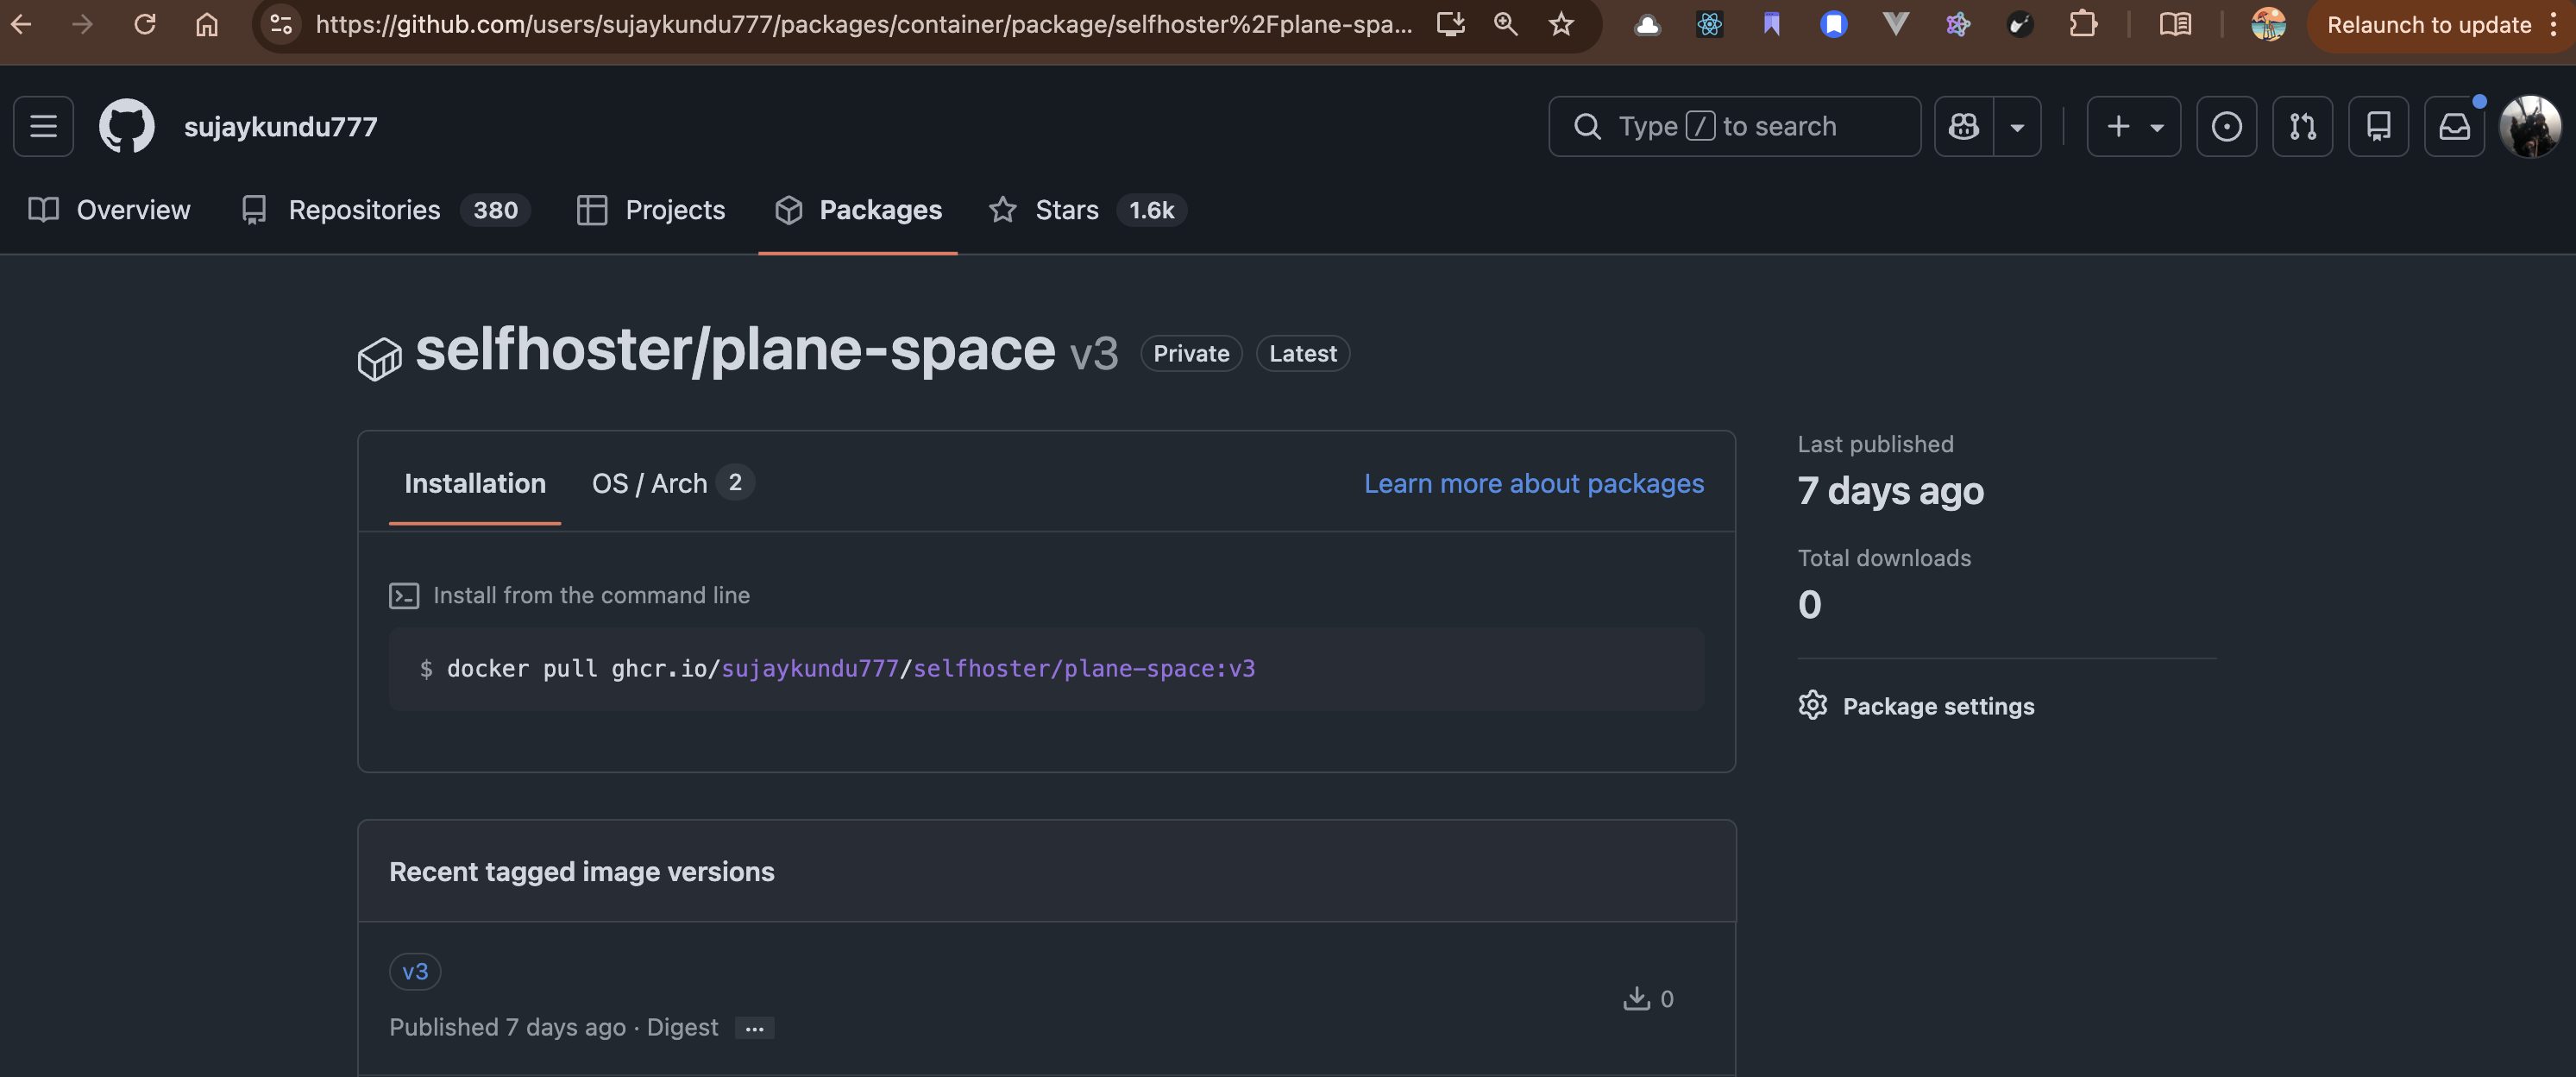
Great ! We successfully pushed to Github Registry
In the next part, we will look in to how we can setup our VPS Server to host our Container Image.
Thanks, Keep Syncing :)