SelfHoster Part 2 - Plane Local Development Setup

This is Part 2 of #SelfHoster Series,
- Part 1 - Self Hosting Plane Locally
- Part 2 - Local Development Setup
- Part 3 - Whitelabel Customizations and building Docker Image
Last part, was focused on how you can setup the open source Project Management Tool locally using Docker.
In this episode, I am going to show you how you can self-host Plane Locally manually, so that it helps you do changes as a Developer.
Running the Plane App Locally :
We can run the plane app, using the following methods :
- Method 1 - using plane selfhosted's setup.sh - Part1
- Method 2 - Running using Docker Compose
- Method 3 - Running manually through pnpm workspaces (best for developers)
Watch video tutorial
Method 2 - Using Docker Compose
-
Clone the repo
git clone https://github.com/makeplane/plane.git
cd plane
- You'll mainly work inside: (project structure)
plane/
 ├── app/
 ├── docker-compose-local.yml
 ├── docker-compose.yml
 ├── .env.example
- Environment configuration (.env)
Create your environment file:
cp .env.example .env
Important variables to configure:
APP_ENV=production
DEBUG=0
SECRET_KEY=super-secret-key
Generate a secret key :
openssl rand --hex 32
This will generate a unique string, use this in SECRET_KEY
Database
POSTGRES_USER=plane
POSTGRES_PASSWORD=plane_password
POSTGRES_DB=plane
POSTGRES_HOST=postgres
POSTGRES_PORT=5432
Redis:
REDIS_HOST=redis
REDIS_PORT=6379
Frontend URL (important)
NEXT_PUBLIC_APP_URL=https://localhost:3000
The complete environment variables looks like this :
# Backend
# Debug value for api server use it as 0 for production use
DEBUG=0

# Secret Key for Django generate using openssl rand --hex 32
SECRET_KEY=your_secret_key

CORS_ALLOWED_ORIGINS="http://localhost:3000,http://localhost:3001,http://localhost:3002,http://localhost:3100"

# Database Settings
POSTGRES_USER="plane"
POSTGRES_PASSWORD="plane"
POSTGRES_HOST="plane-db"
POSTGRES_DB="plane"
POSTGRES_PORT=5432
DATABASE_URL=postgresql://${POSTGRES_USER}:${POSTGRES_PASSWORD}@${POSTGRES_HOST}:${POSTGRES_PORT}/${POSTGRES_DB}

# Redis Settings
REDIS_HOST="plane-redis"
REDIS_PORT="6379"
REDIS_URL="redis://${REDIS_HOST}:6379/"

# RabbitMQ Settings
RABBITMQ_HOST="plane-mq"
RABBITMQ_PORT="5672"
RABBITMQ_USER="plane"
RABBITMQ_PASSWORD="plane"
RABBITMQ_VHOST="plane"

# AWS Settings
AWS_REGION=""
AWS_ACCESS_KEY_ID="access-key"
AWS_SECRET_ACCESS_KEY="secret-key"
AWS_S3_ENDPOINT_URL="http://localhost:9000"
# Changing this requires change in the proxy config for uploads if using minio setup
AWS_S3_BUCKET_NAME="uploads"
# Maximum file upload limit
FILE_SIZE_LIMIT=5242880
# Signed URL expiration time in seconds (default: 3600 = 1 hour)
# Set to 30 for 30 seconds, 300 for 5 minutes, etc.
SIGNED_URL_EXPIRATION=3600

# Settings related to Docker
DOCKERIZED=1 # deprecated

# set to 1 If using the pre-configured minio setup
USE_MINIO=0


# Email redirections and minio domain settings
WEB_URL="http://localhost:8000"

# Gunicorn Workers
GUNICORN_WORKERS=2

# Base URLs
ADMIN_BASE_URL="http://localhost:3001"
ADMIN_BASE_PATH="/god-mode/"

SPACE_BASE_URL="http://localhost:3002"
SPACE_BASE_PATH="/spaces"

APP_BASE_URL="http://localhost:3000"
APP_BASE_PATH=""

LIVE_BASE_URL="http://localhost:3100"
LIVE_BASE_PATH="/live"

LIVE_SERVER_SECRET_KEY="secret-key"

# Hard delete files after days
HARD_DELETE_AFTER_DAYS=60

# Force HTTPS for handling SSL Termination
MINIO_ENDPOINT_SSL=0

# API key rate limit
API_KEY_RATE_LIMIT="60/minute"
From the root folder:
# To Stop
docker compose -f docker-compose-local.yml down
# To start the app
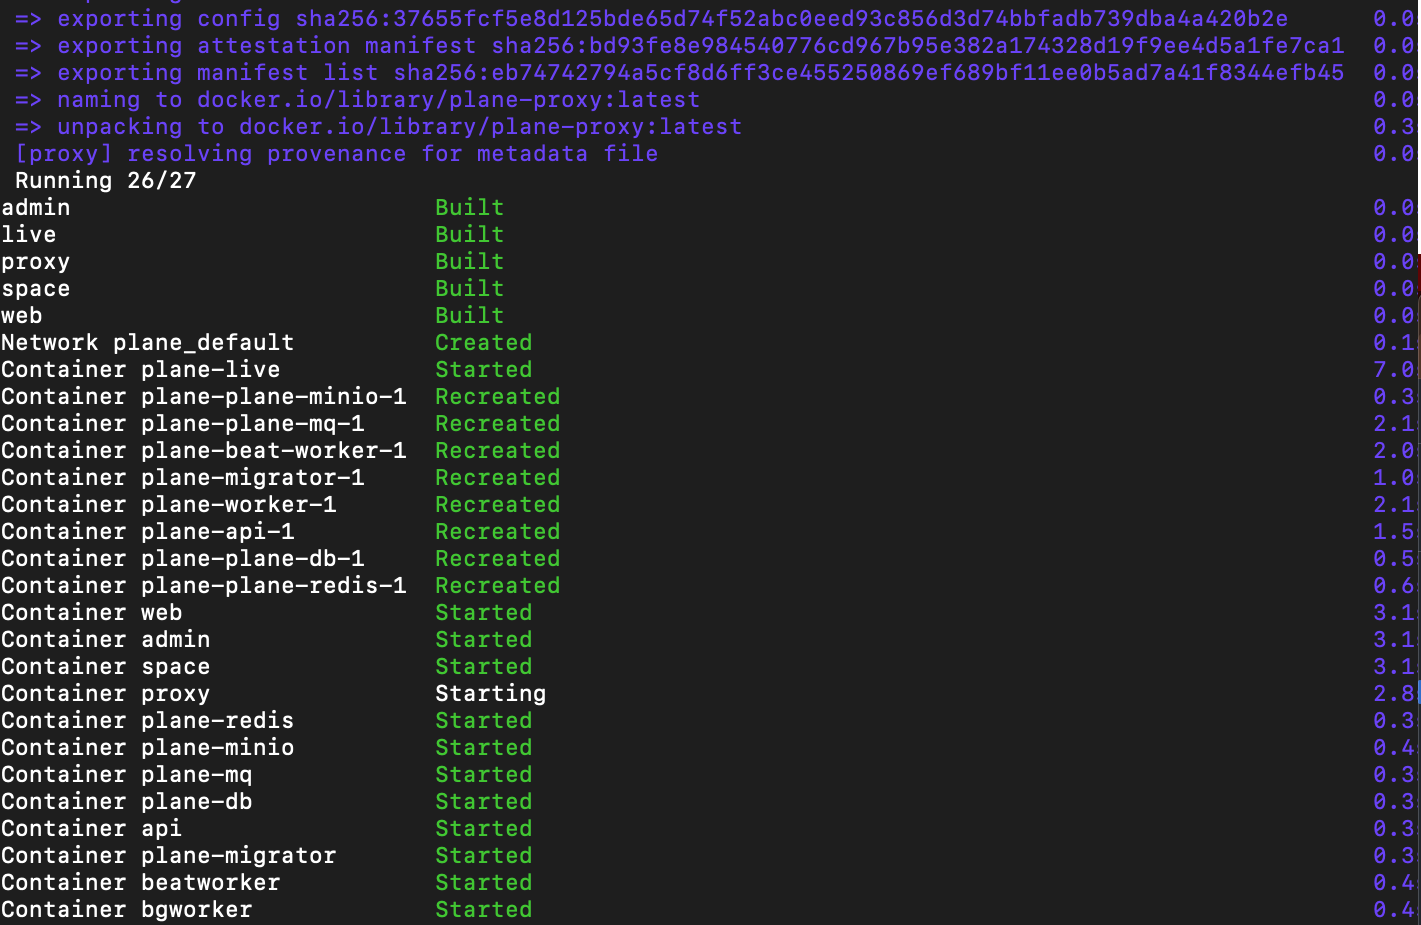
docker compose -f docker-compose-local.yml up -d
What this does:
- Starts all required services (PostgreSQL, Redis, Plane API, frontend, proxy, workers, etc.)
- Runs them detached (-d) in the background
First boot may take a few minutes

Upgrading Plane
git pull origin main
docker compose down
docker compose up -d --build
Always back up:
- PostgreSQL volume
- Media files
Method 3 - Using Pnpm workspaces (For Developers)
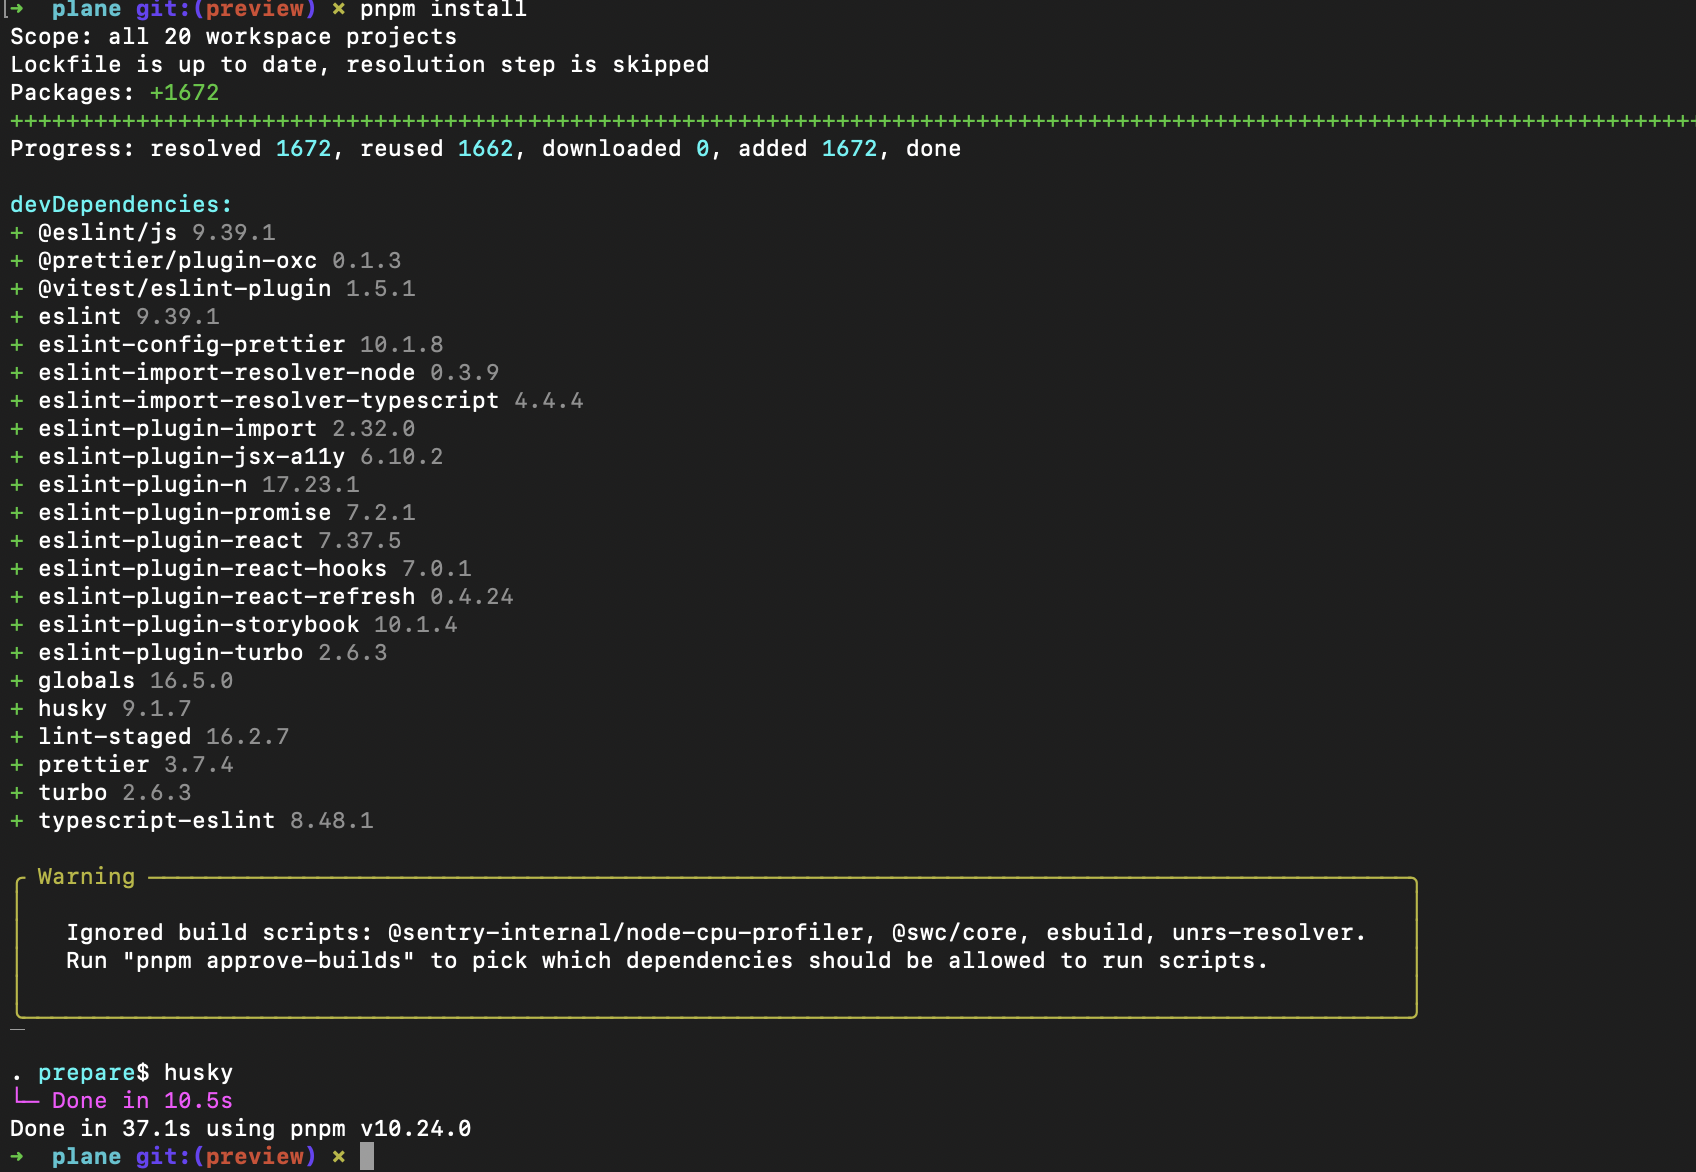
Download pnpm
git clone https://github.com/makeplane/plane.git
cd plane
rm -rf node_modules
pnpm install
Run frontend locally :
You need to run the 3 apps seperatly, which is inside apps - web, admin, space
And you also need to run the api (backend) locally, which you can do using docker (only for this service)
1. Running web
Go to apps/web, then create .env
VITE_API_BASE_URL="http://localhost:8000"

VITE_WEB_BASE_URL="http://localhost:3000"

VITE_ADMIN_BASE_URL="http://localhost:3001"
VITE_ADMIN_BASE_PATH="/god-mode"

VITE_SPACE_BASE_URL="http://localhost:3002"
VITE_SPACE_BASE_PATH="/spaces"

VITE_LIVE_BASE_URL="http://localhost:3100"
VITE_LIVE_BASE_PATH="/live"
Open a new terminal and Run the web app using :
cd plane/apps/web
pnpm run dev
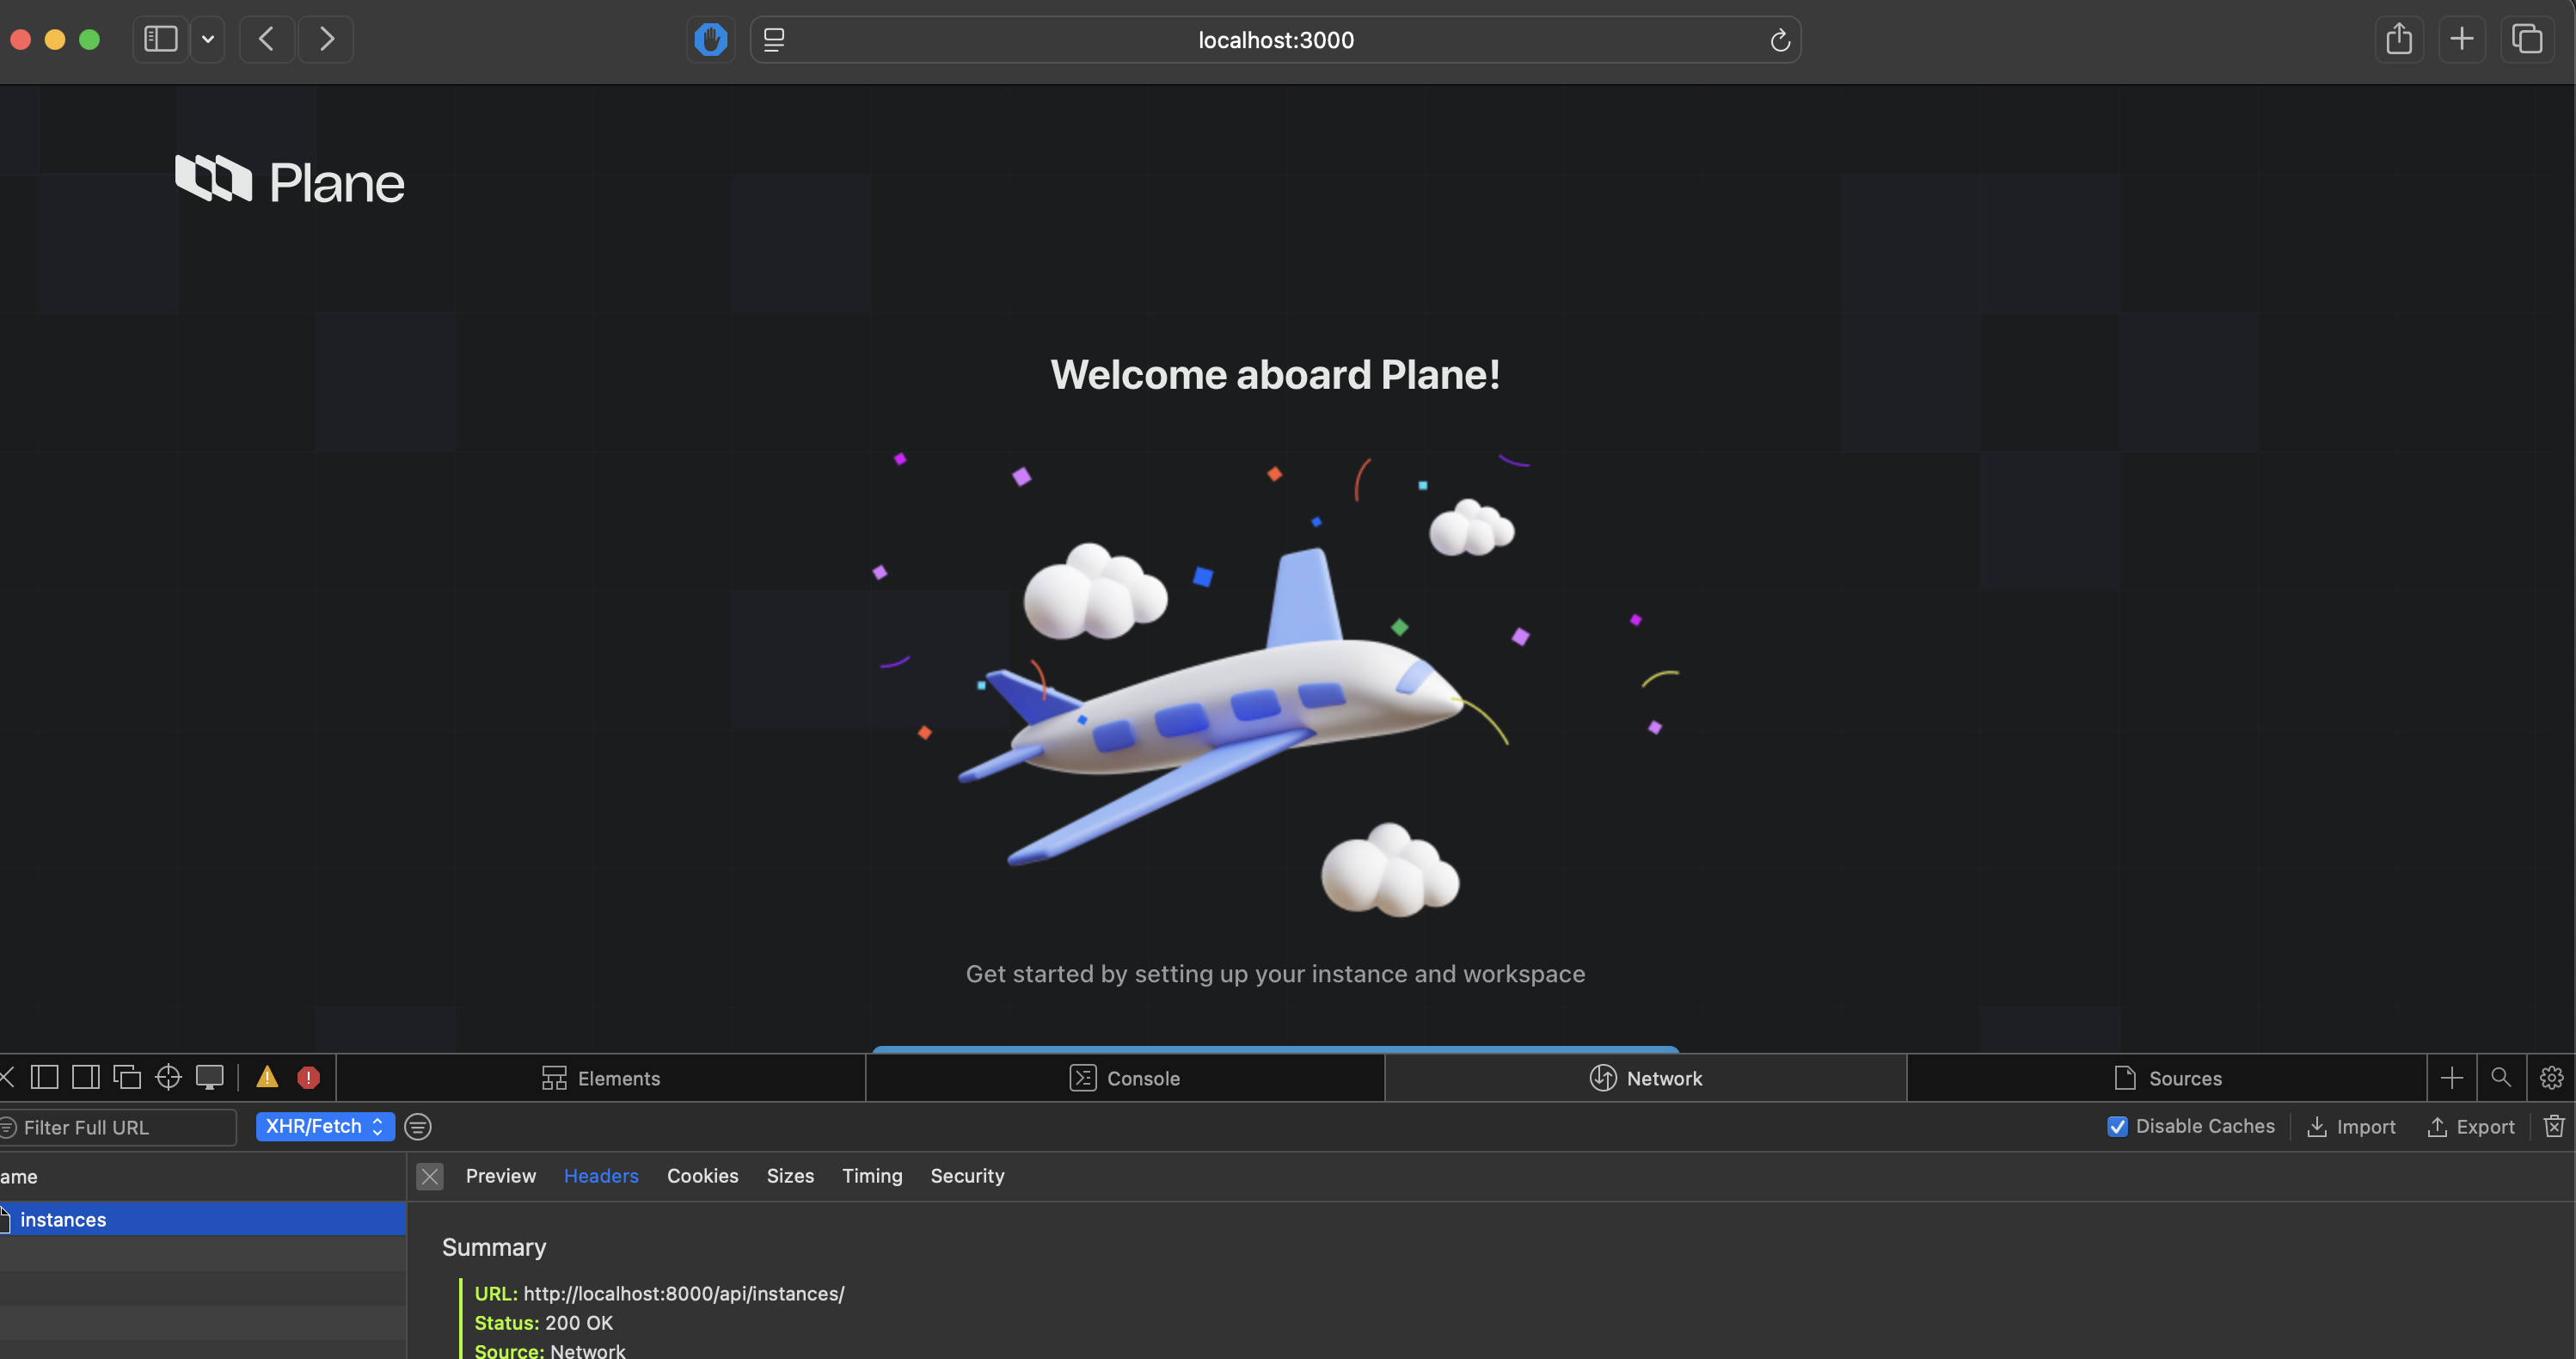
This should run the web app in http://localhost:3000

2. Running the Admin App:
in app/admin. create a .env variable
VITE_API_BASE_URL="http://localhost:8000"

VITE_WEB_BASE_URL="http://localhost:3000"

VITE_ADMIN_BASE_URL="http://localhost:3001"
VITE_ADMIN_BASE_PATH="/god-mode/"

VITE_SPACE_BASE_URL="http://localhost:3002"
VITE_SPACE_BASE_PATH="/spaces"

VITE_LIVE_BASE_URL="http://localhost:3100"
VITE_LIVE_BASE_PATH="/live"
and in a new terminal run :
pnpm run dev
And it should start http://localhost:3001/god-mode/
3. Running the space app:
Space :
create a .env file → apps/space/.env,
VITE_API_BASE_URL="http://localhost:8000"

VITE_WEB_BASE_URL="http://localhost:3000"

VITE_ADMIN_BASE_URL="http://localhost:3001"
VITE_ADMIN_BASE_PATH="/god-mode/"

VITE_SPACE_BASE_URL="http://localhost:3002"
VITE_SPACE_BASE_PATH="/spaces"

VITE_LIVE_BASE_URL="http://localhost:3100"
VITE_LIVE_BASE_PATH="/live"
Run the space app in new terminal
cd plane/apps/space
pnpm run dev
4. Run Backend locally :
We can run the backend using local django setup, or use the docker compose to run our backend through docker.
Run the backend using docker :
Run the following command to run the backend
In the root directory, run the following command :
docker compose -f docker-compose-local.yml up api
The backend should be running at http://localhost:8000
This will start:
- api → Django backend
- postgres
- redis
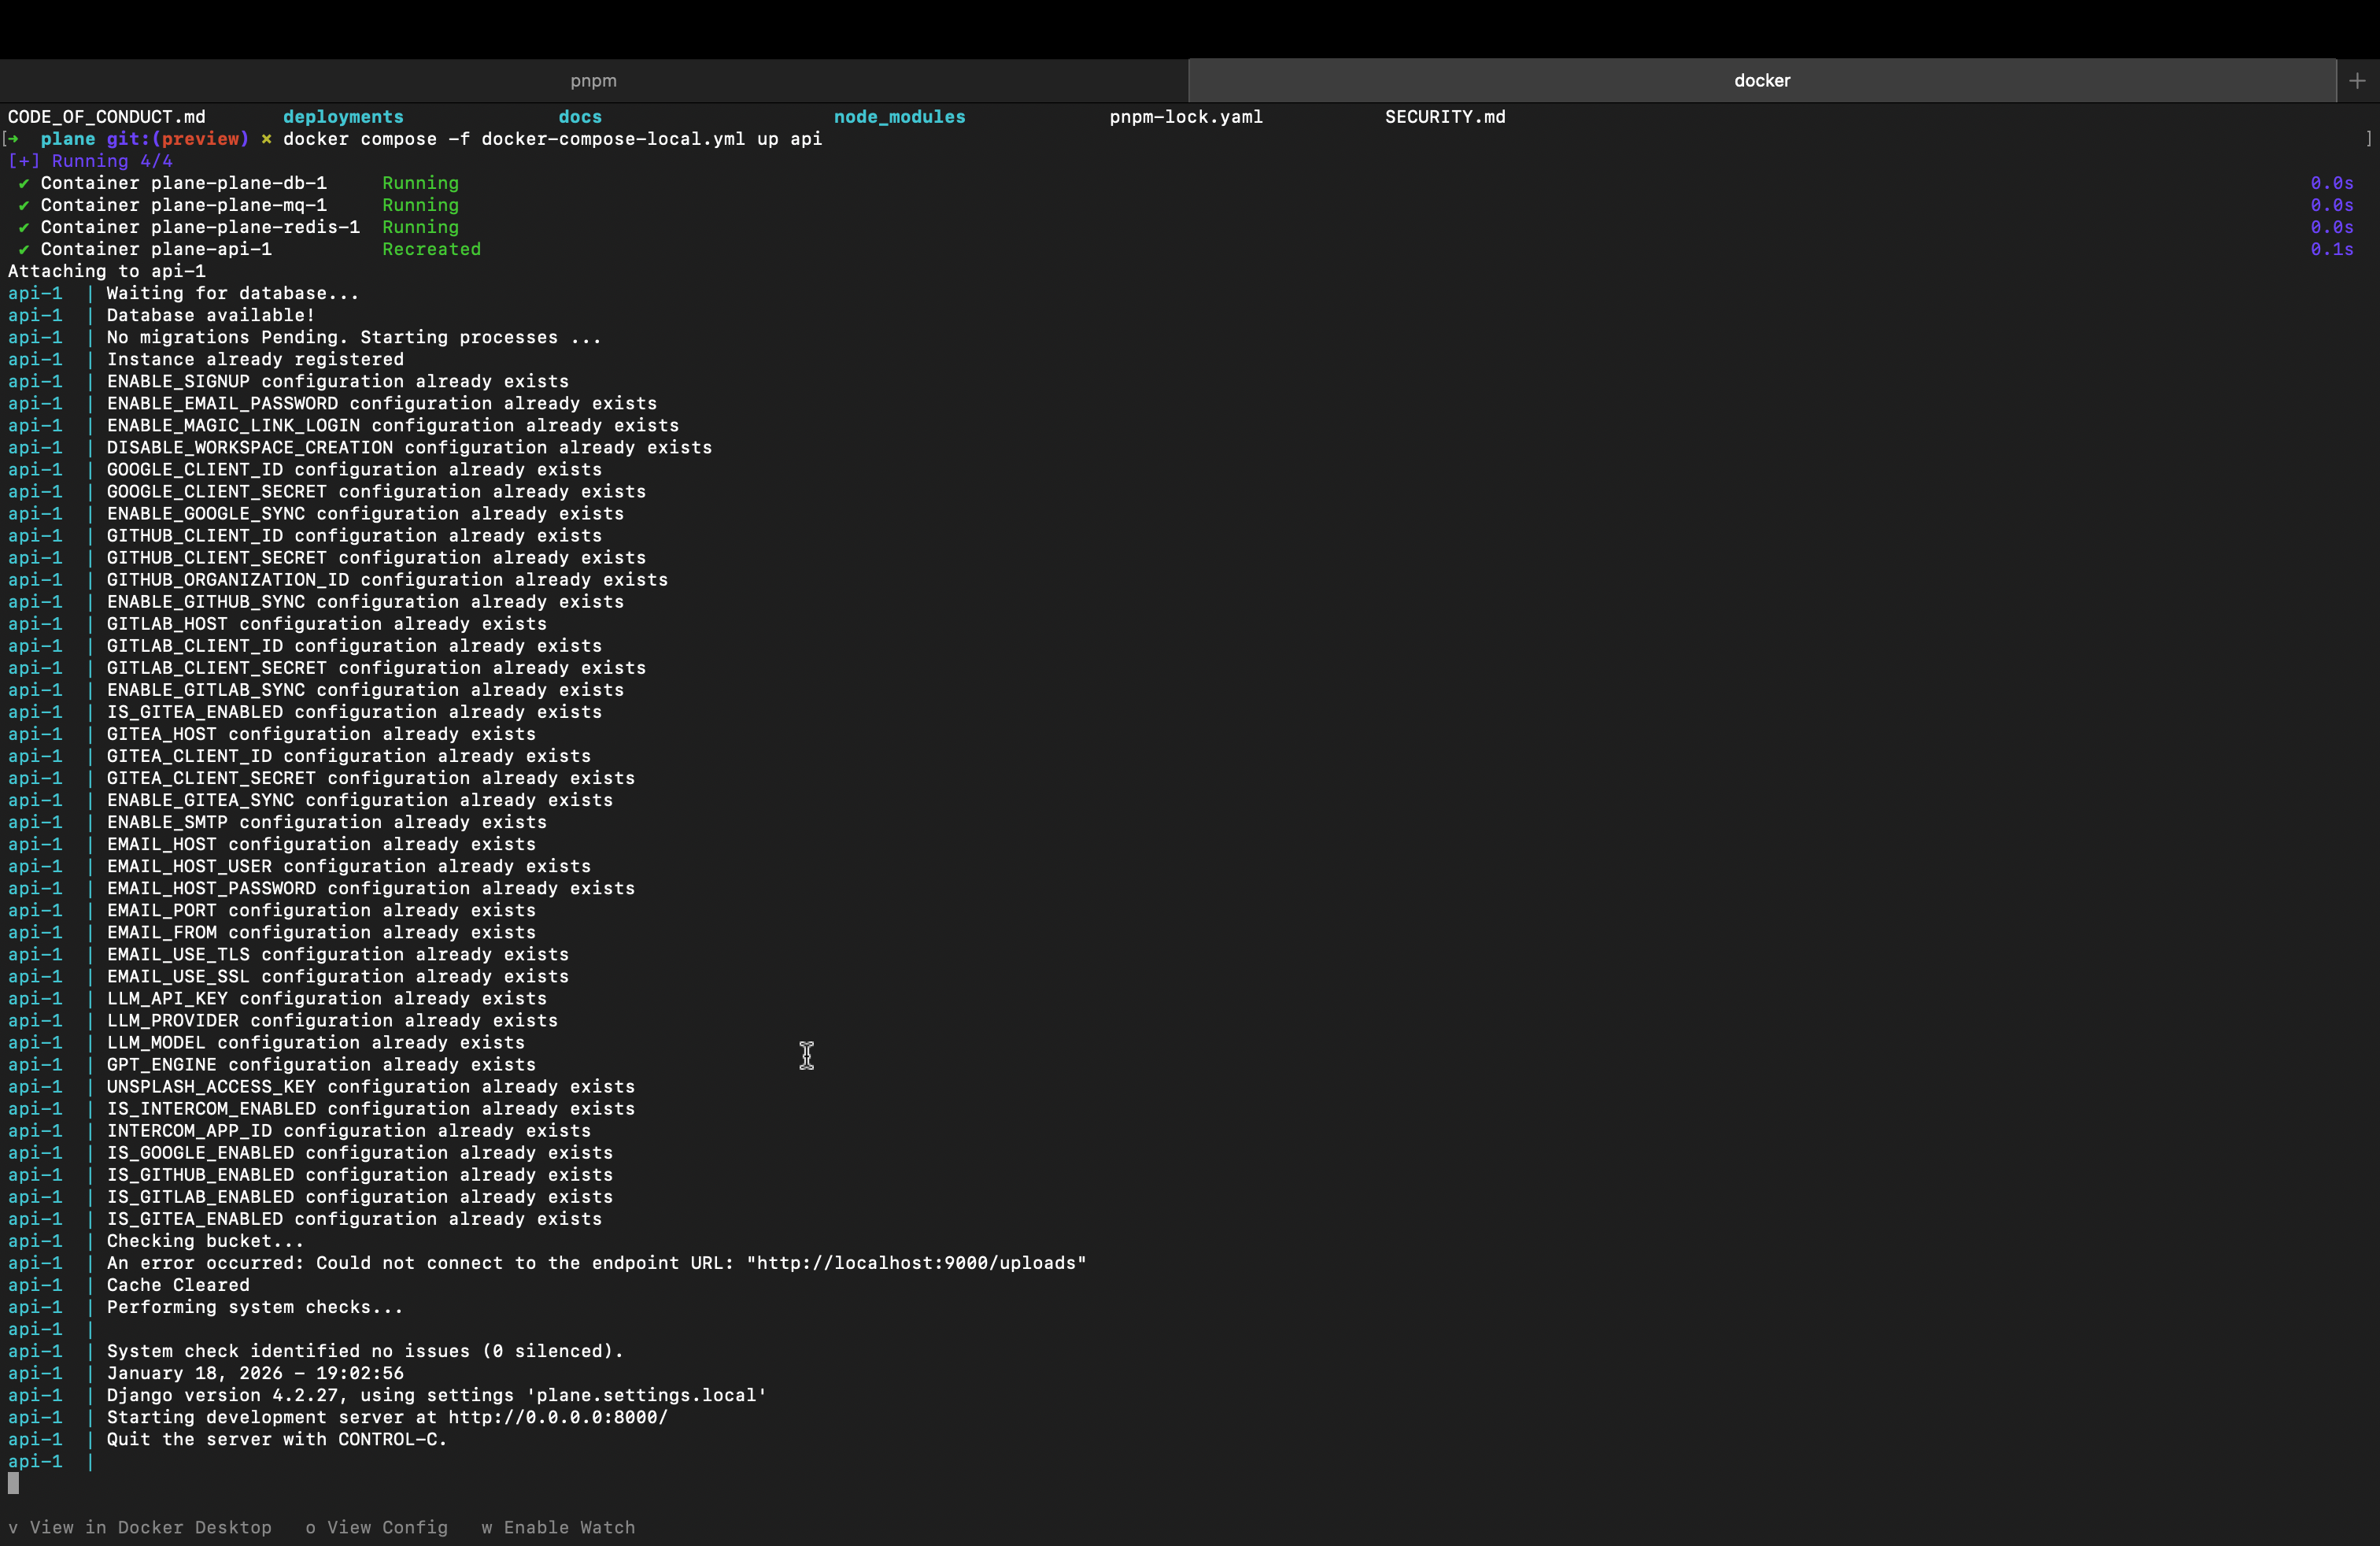
visit http://localhost:8000
Running the app:
Once you visit the http://localhost:3000 it will show :
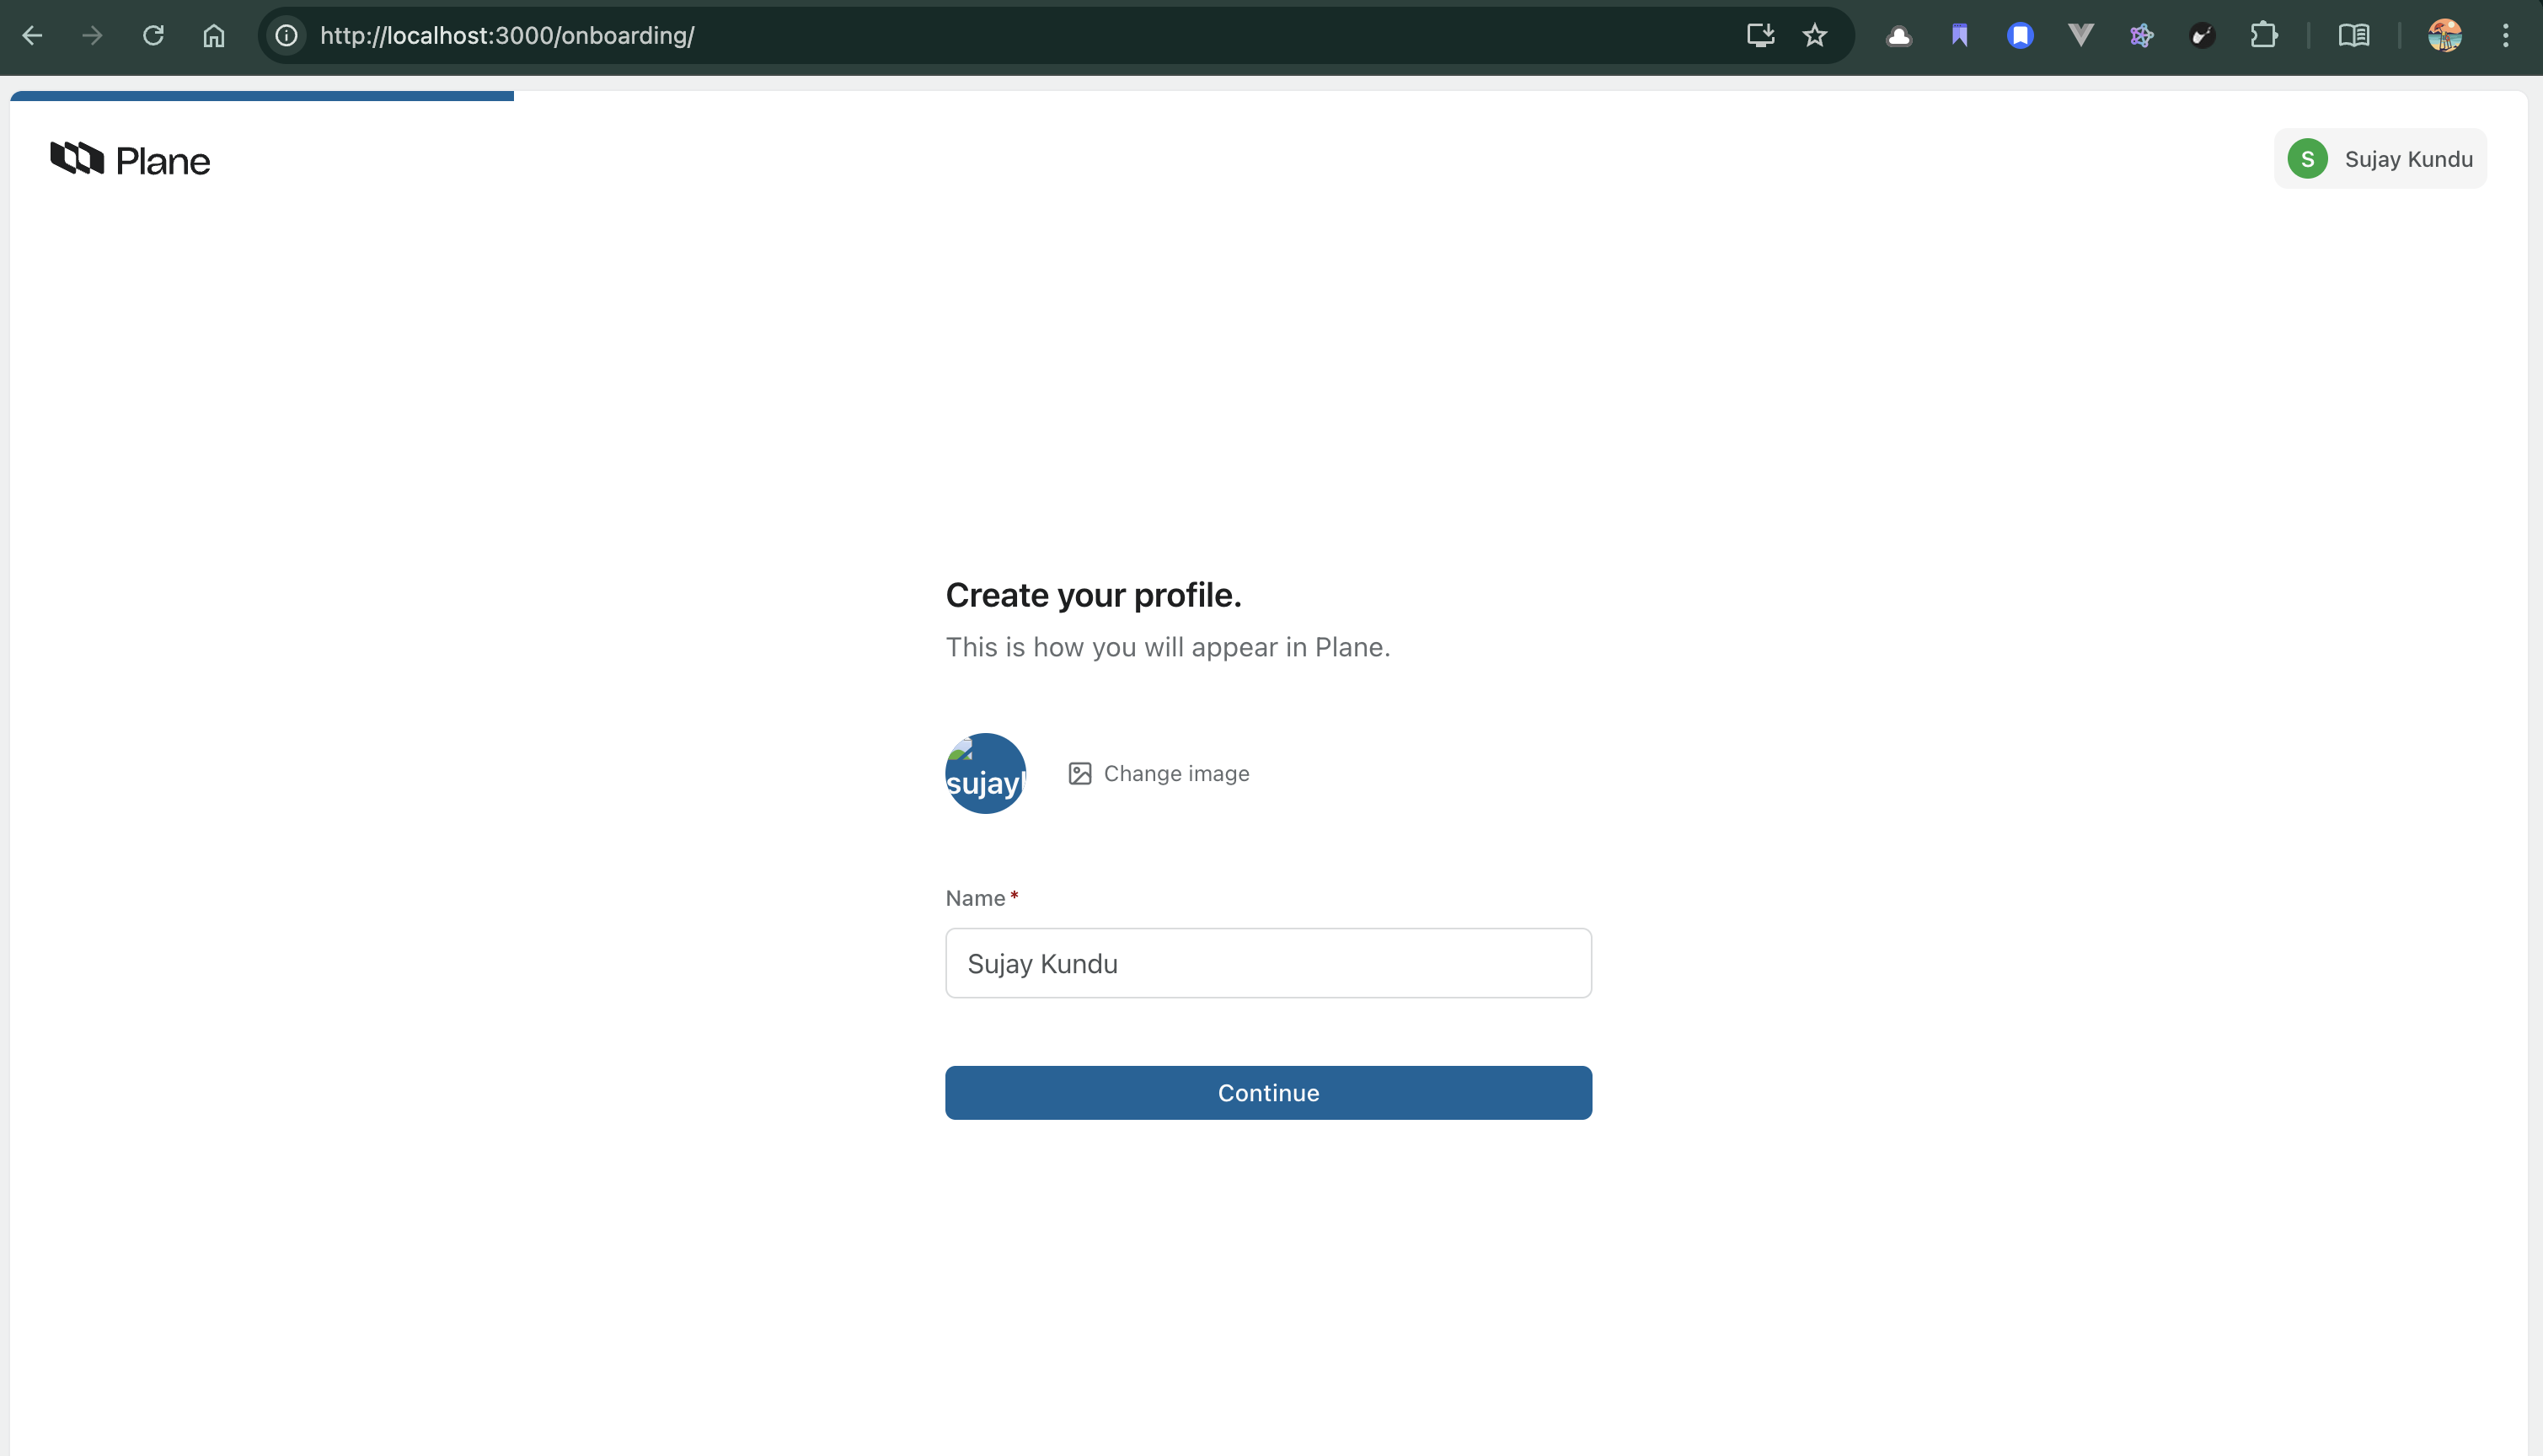
Once you register your super user:
Instance Admin and God Mode
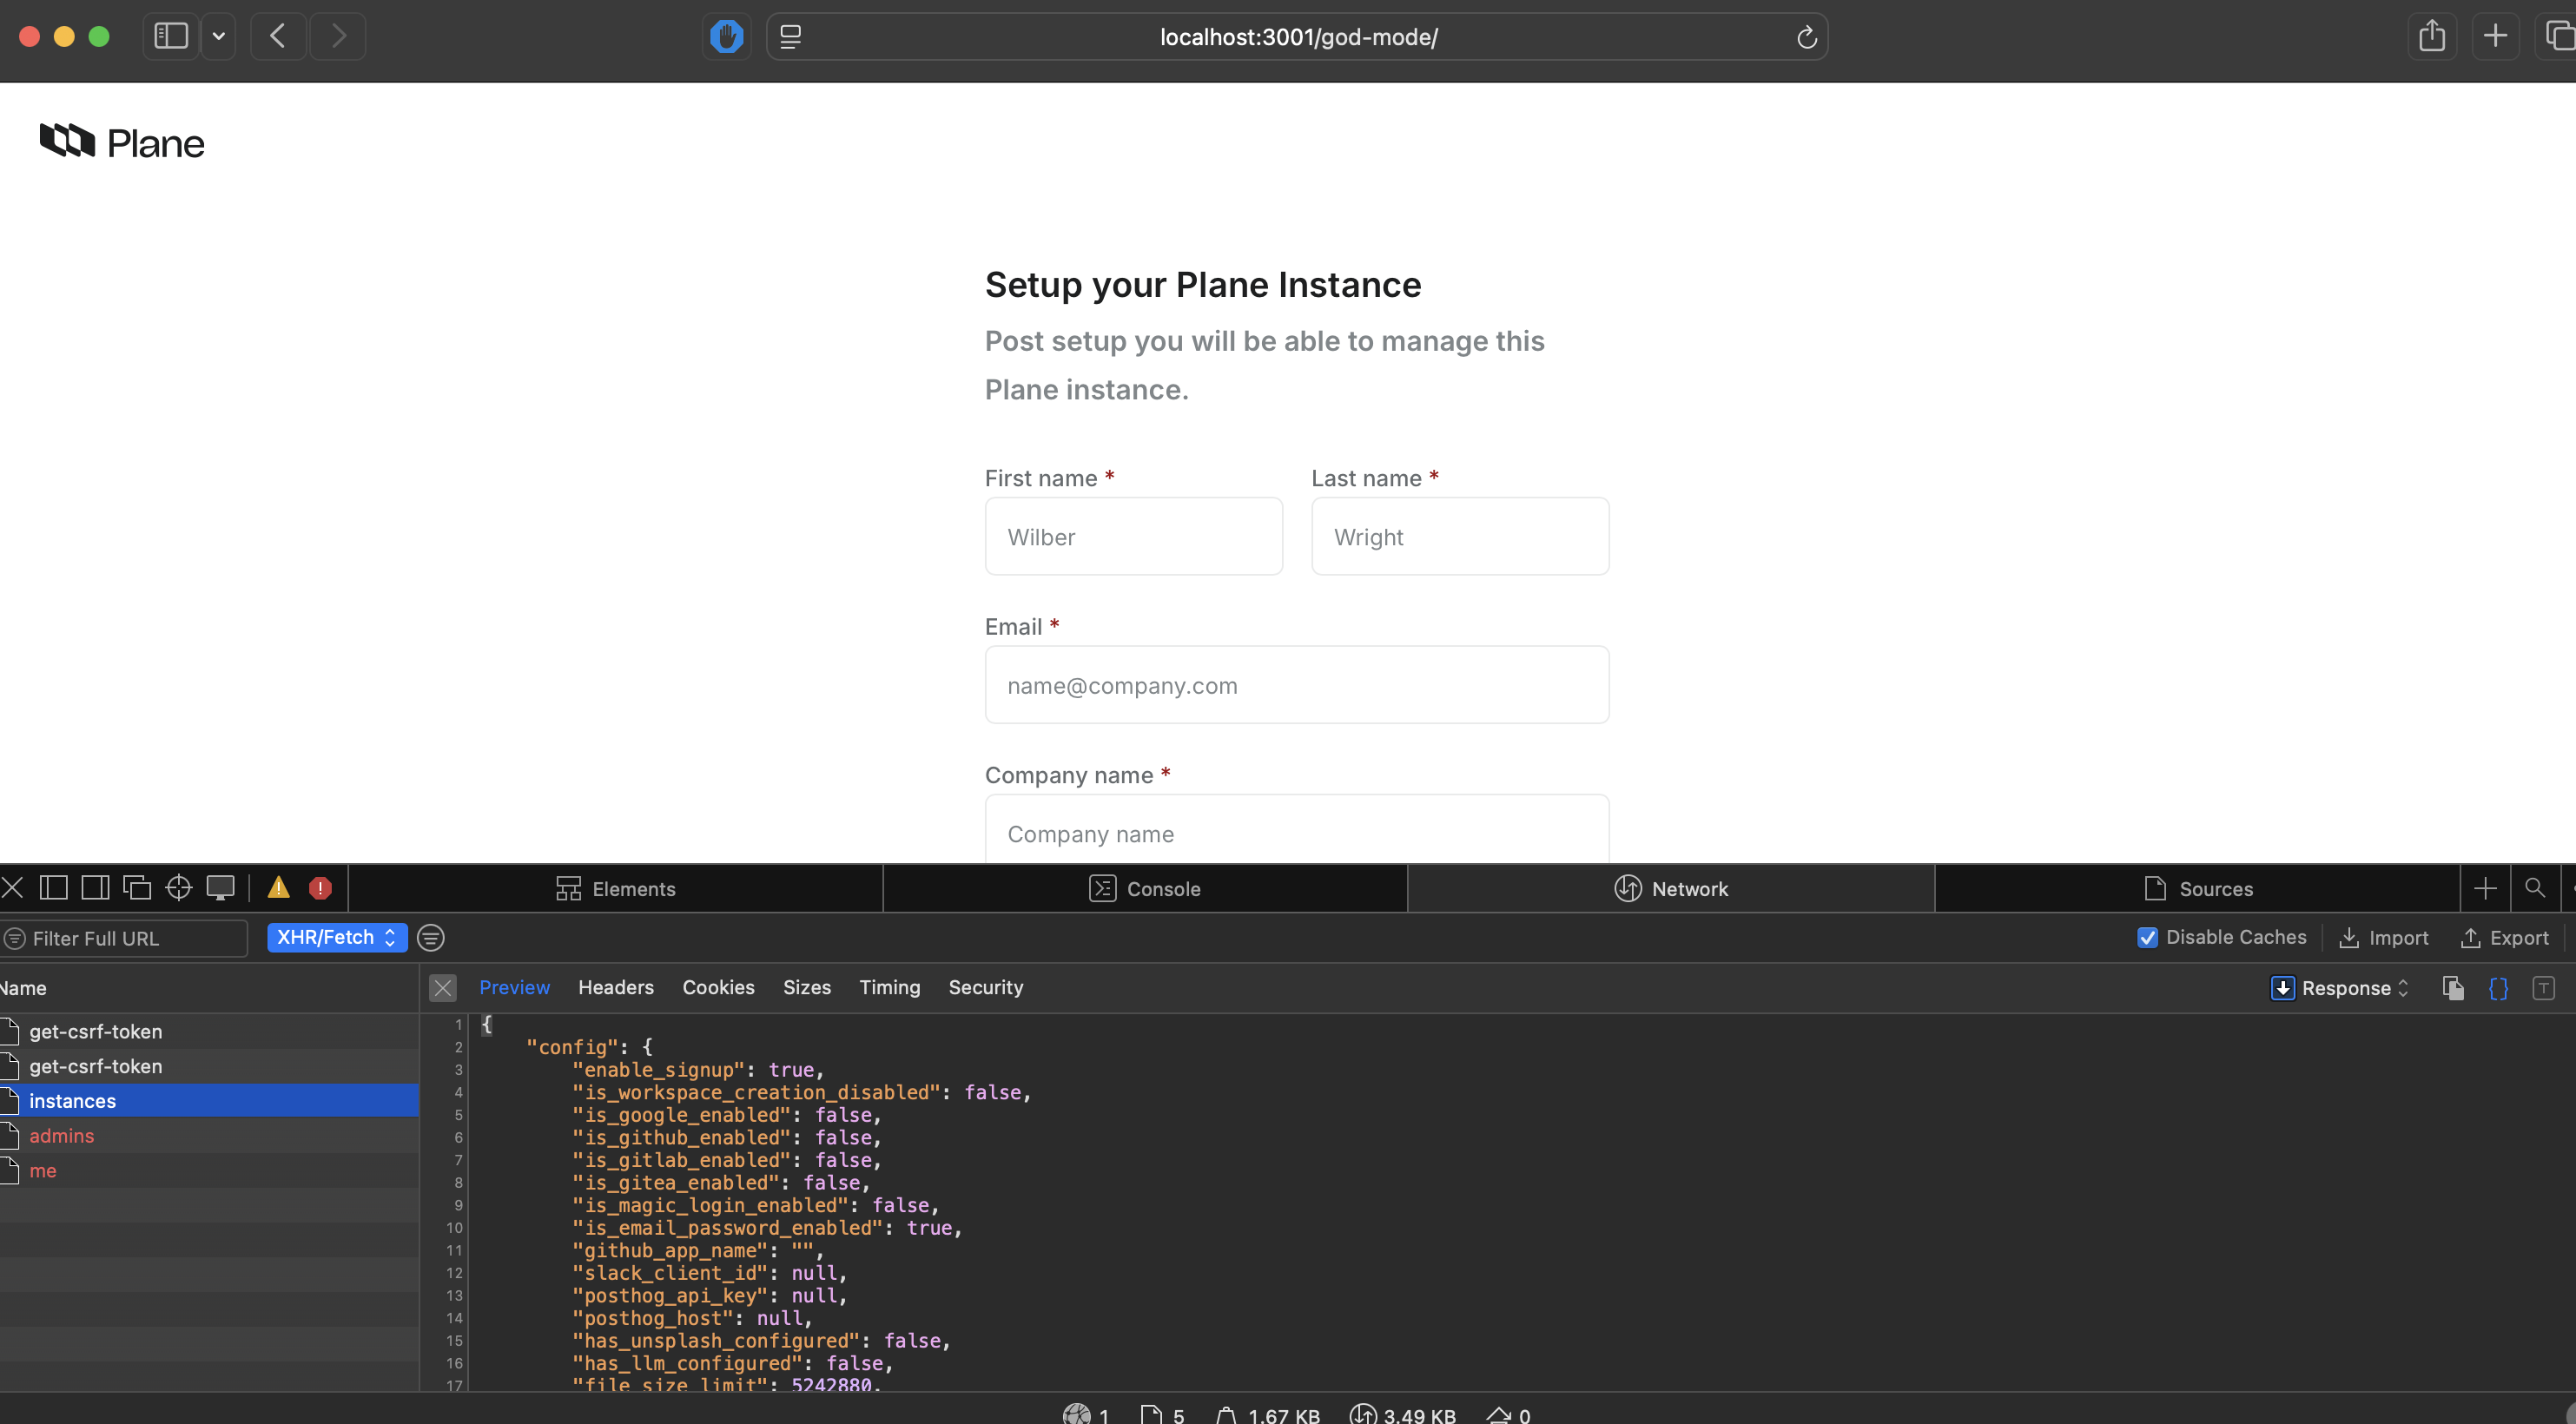
Configuring Instance
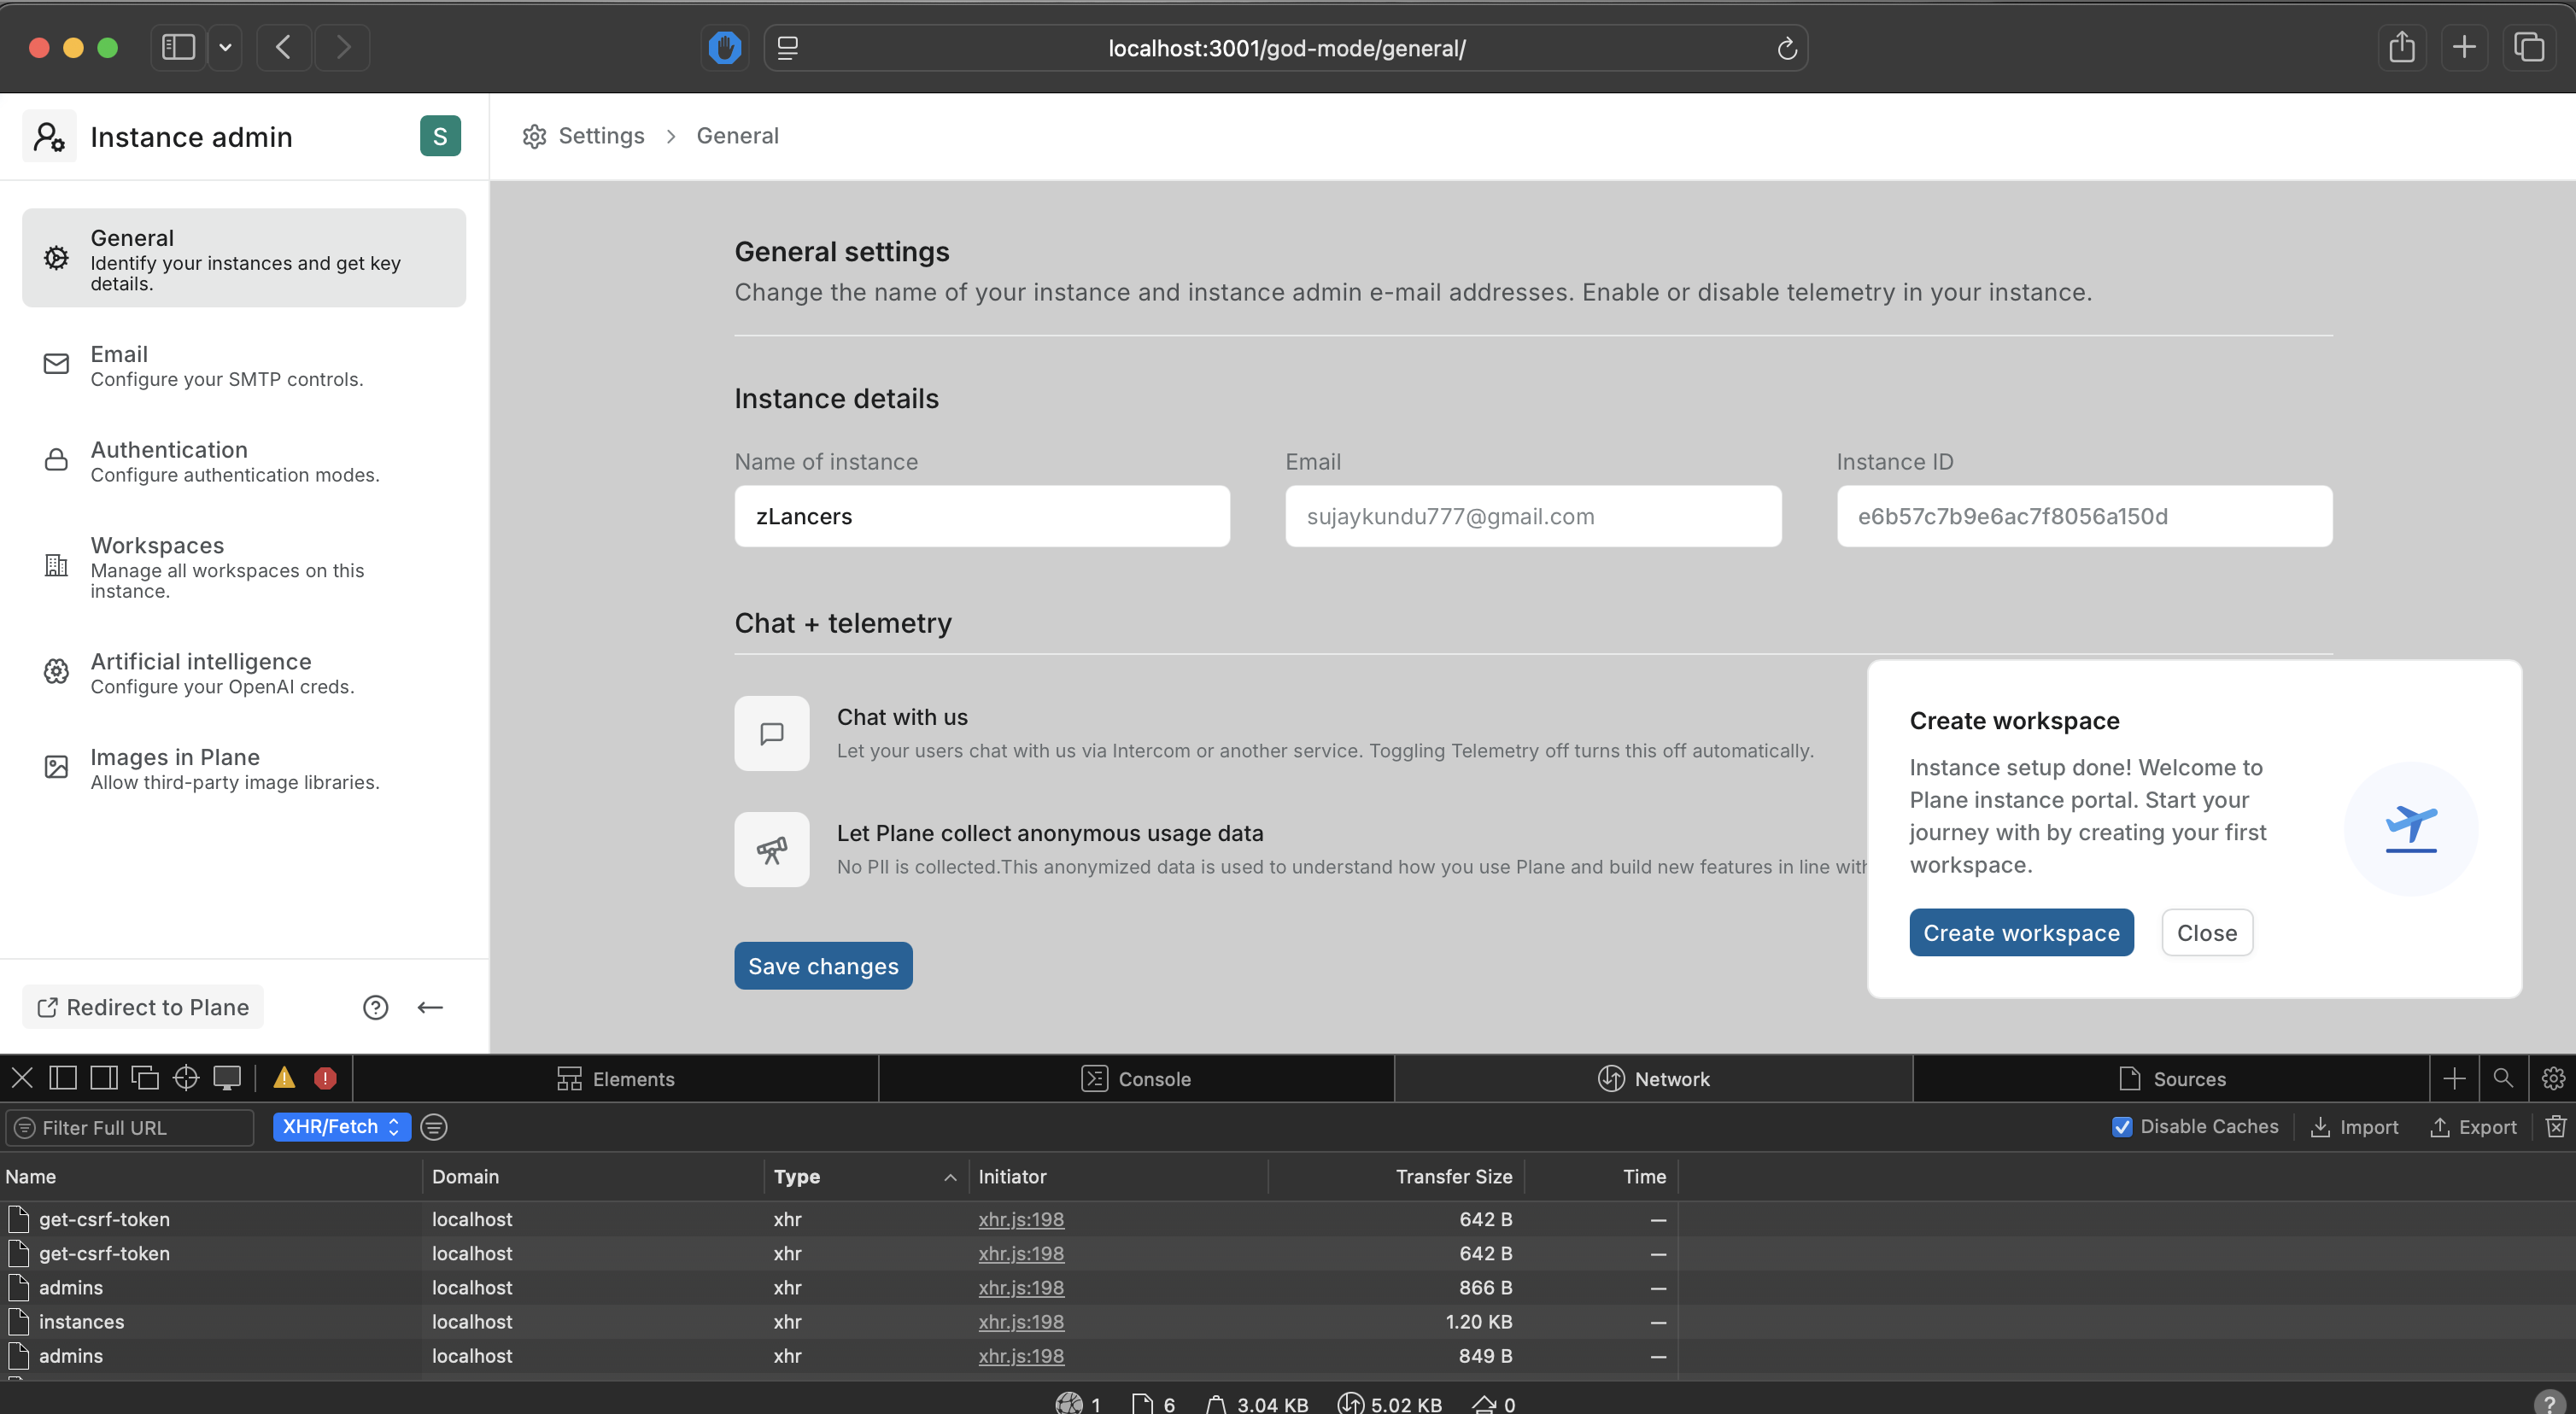
Create a workspace
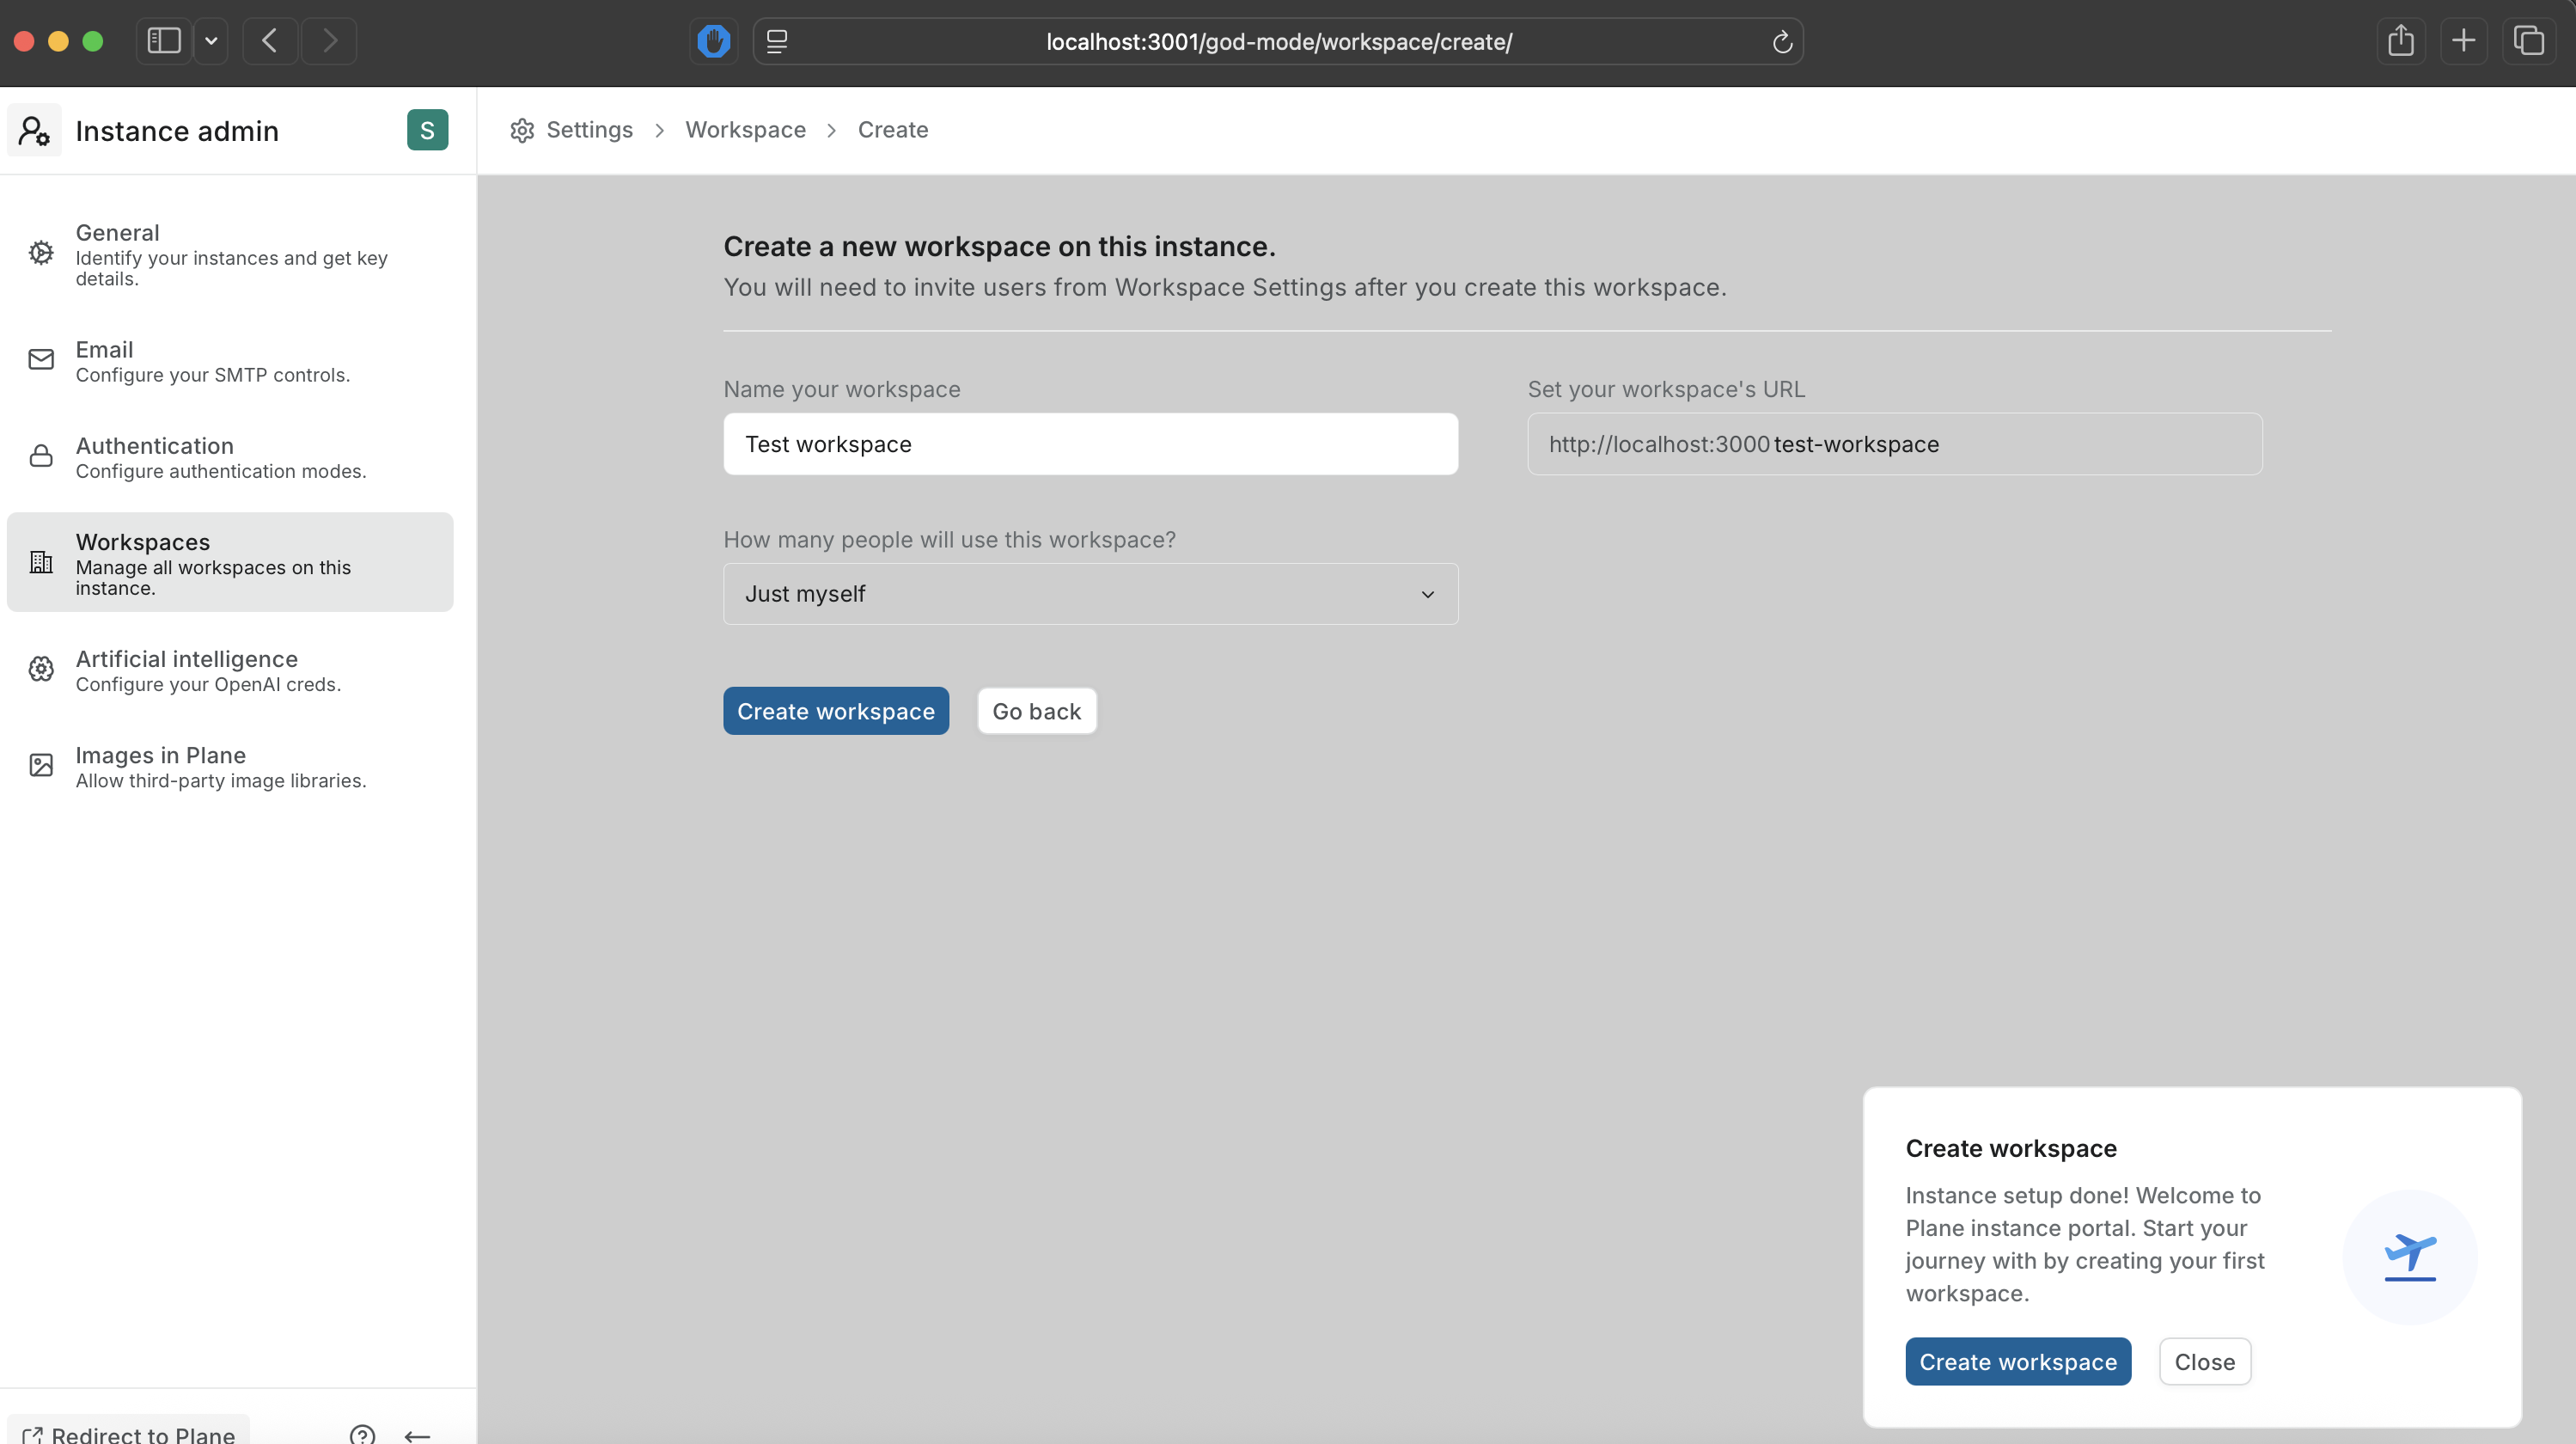
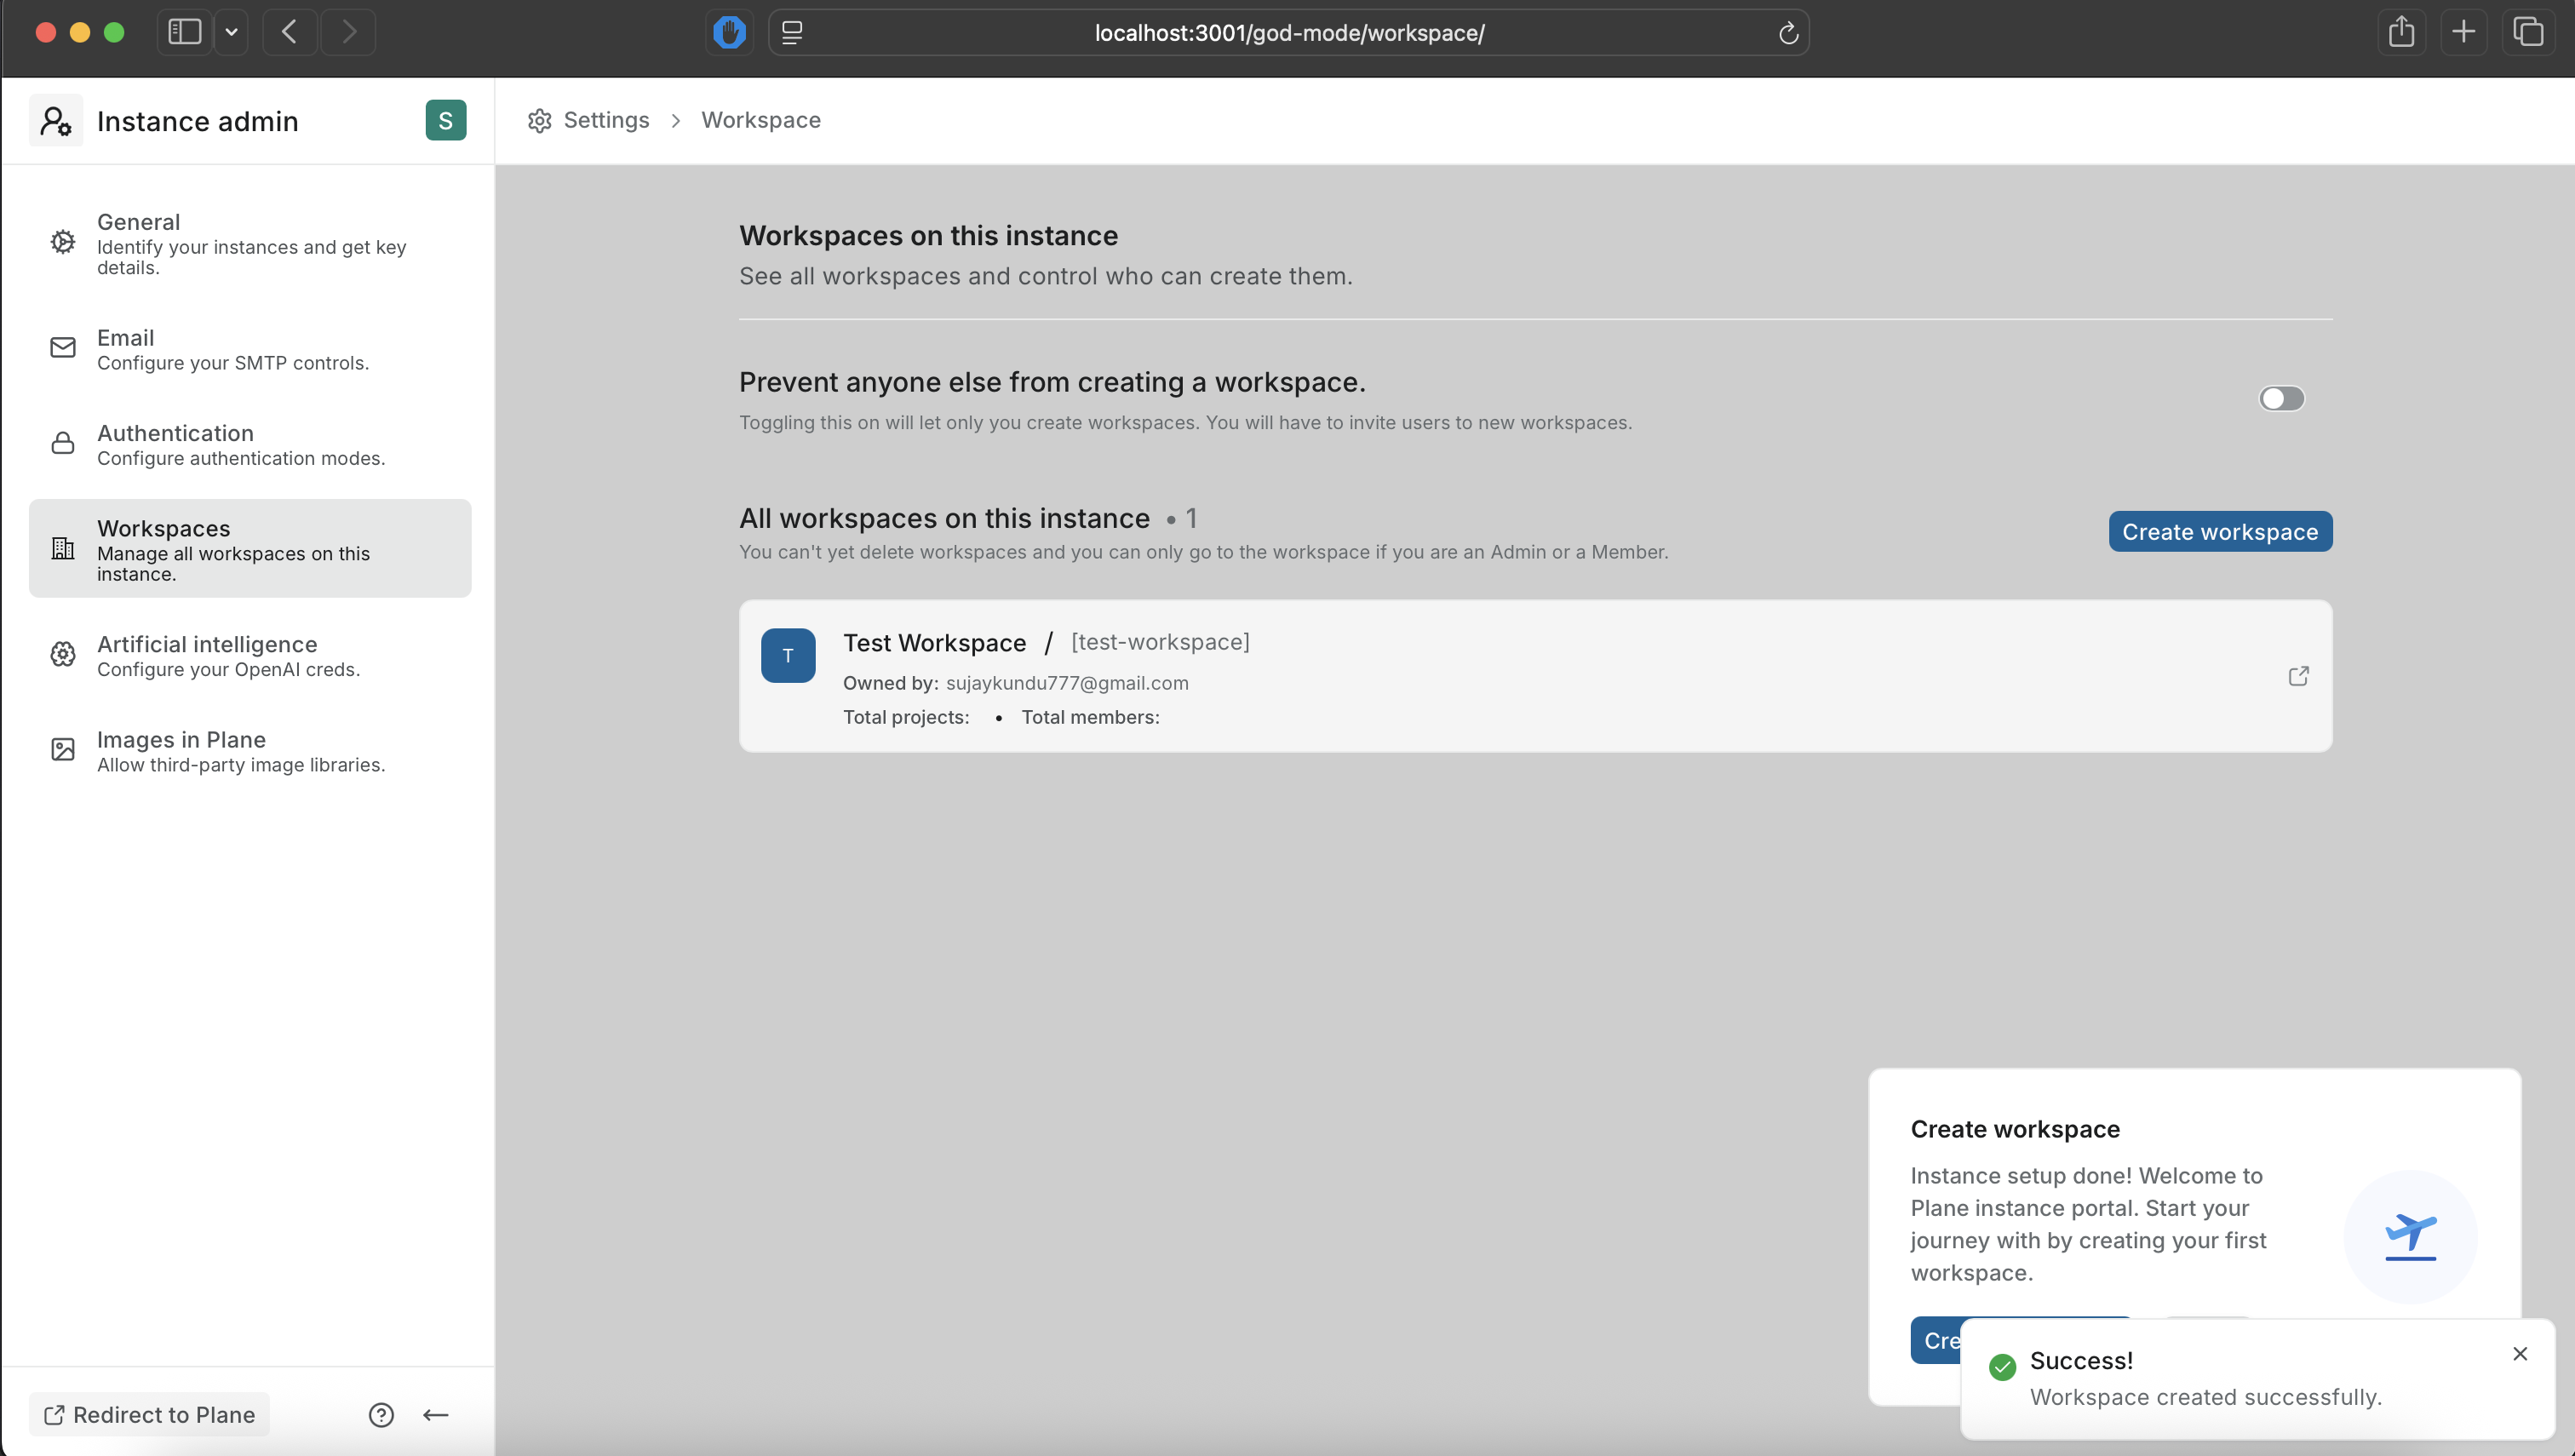
workspaces
You will be redirected to http://localhost:3000/your-workspace-url

Thanks, Do follow the series :)
In the next Part, we will see how to remove the plane-branding from the app (whitelabelling) to make it yours.
Stay Tuned :)