SelfHoster Part 1. - Self host Plane Locally (a Project management tool)

Welcome to the episode 1 of the series - The SelfHoster, Follow this series if you are someone who is tired of paying for all the cloud tools. Let me help you with how to use open source tools.
Self Hosting Locally - Plane
About Plane
In short. → Plane is a Project Management Tool.
🛫 What Plane Is
Plane is a modern project management tool positioned as an open-source alternative to Jira, Linear, Asana, ClickUp, and similar tools. It’s designed for tracking issues, running cycles/sprints, managing roadmaps, docs, and more. You can use it in the cloud or self-host it on your own infrastructure.
📦 Open Source Code
- The source code is publicly available on GitHub under the GNU Affero General Public License v3.0 (AGPL-3.0).
- AGPL-3.0 is a copyleft open-source license, which means:
- You can view, run, modify, and distribute the code.
- Derivative works must also be released under the AGPL-3.0 when distributed.
👉 Repository: https://github.com/makeplane/plane
🧠 Notes About Open Source vs. Product
- Plane calls itself open source, and its core codebase is licensed under AGPL-3.0.
- However, like many “open core” projects, some features (especially advanced enterprise ones) may be part of paid plans or not fully available in the community edition — meaning open source doesn’t necessarily mean everything is free or unlocked.
- You can self-host the open-source version if you want full control of your data and infrastructure.
11️⃣ When self-hosting makes sense
✅ You should self-host if:
- You want full data ownership
- You need internal PM tooling
- You want to customize workflows/UI
- You want to integrate deeply with internal tools
❌ Cloud version better if:
- You don’t want infra maintenance
- You need guaranteed uptime/support
1️⃣ What you need before starting
System requirements - Prerequisites)
- Docker & Docker Compose (v2 recommended)
- A Linux server / VM (local, EC2, Hetzner, DigitalOcean, etc.)
- Minimum:
- 2 CPU
- 4 GB RAM (8 GB recommended for teams)
- 20–30 GB disk
What Plane runs on
Plane is a multi-service app, roughly:
- Frontend → Next.js
- Backend API → Django + DRF
- Worker → Django Celery
- Database → PostgreSQL
- Cache / Queue → Redis
- File storage → Local or S3-compatible
- Auth → Email/password, OAuth (optional)
All of this is bundled via Docker.
Setup Plane locally using setup.sh:
- Create a folder named
plane-selfhoston your machine for deployment and data storage.
mkdir plane-selfhosted
- Navigate to this folder using the cd command.
cd plane-selfhost
- Download the latest stable release
curl -fsSL -o setup.sh https://github.com/makeplane/plane/releases/latest/download/setup.sh
- Make the file executable:
chmod +x setup.sh
- Run the following command :
./setup.sh
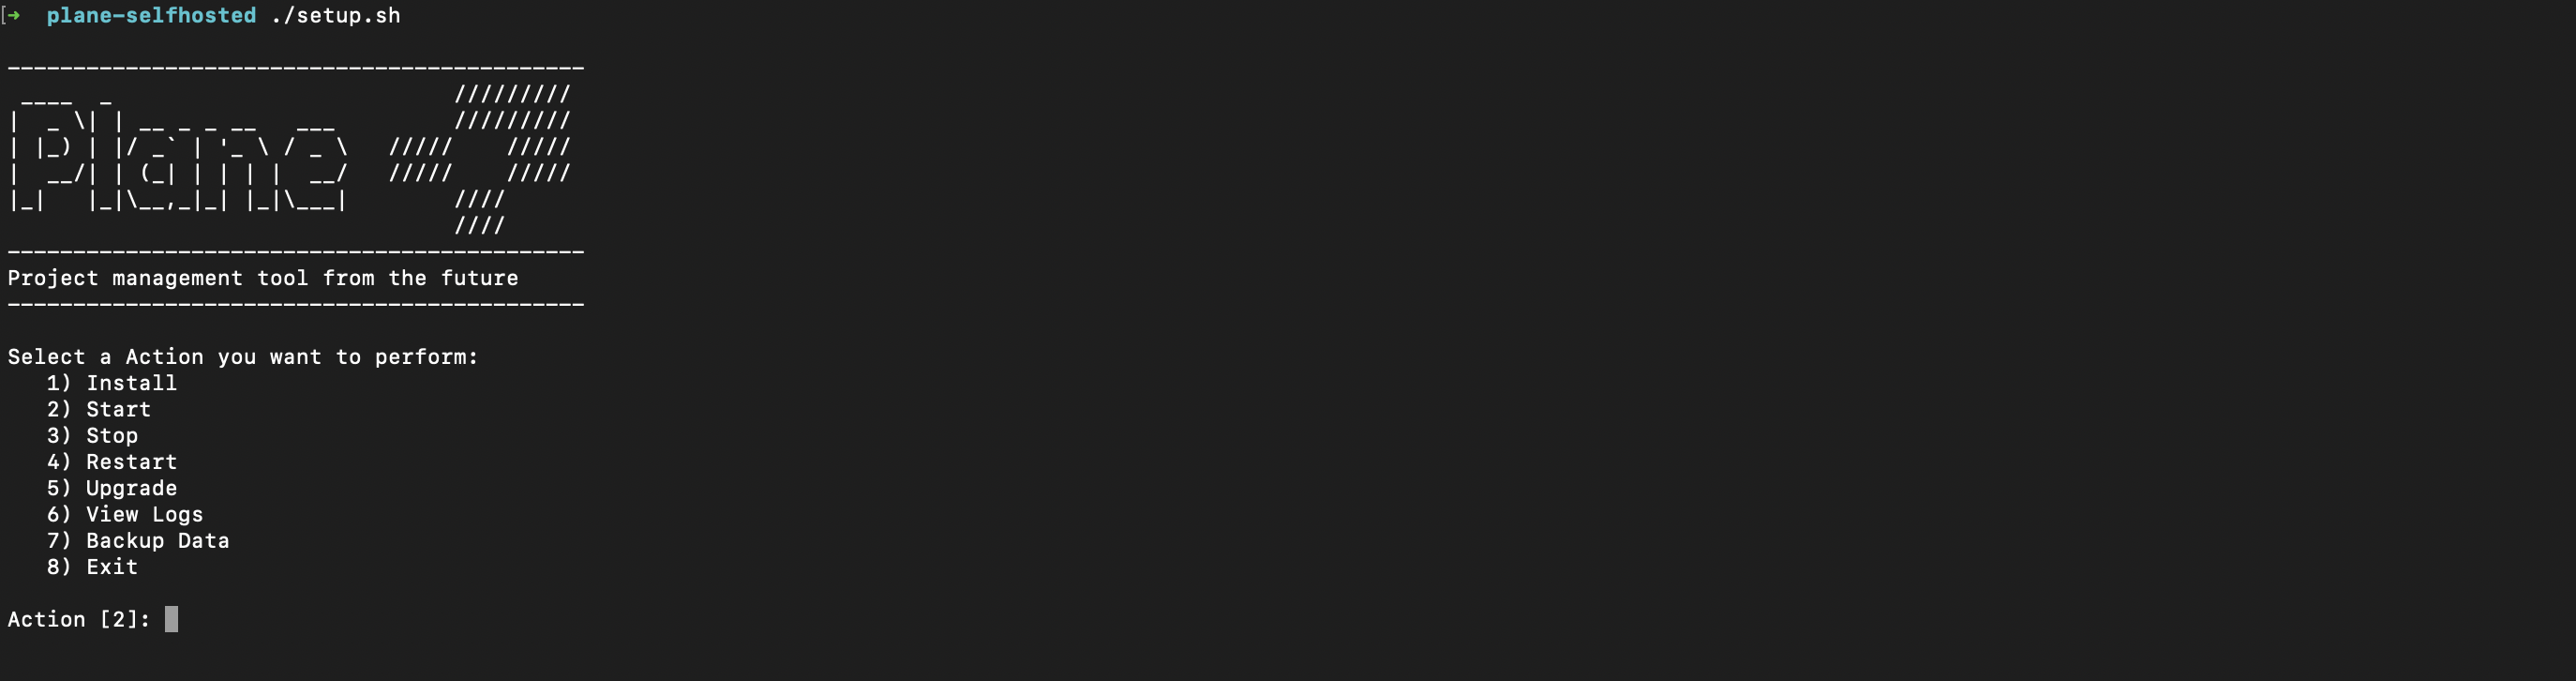
This will prompt you with the below options.
Select a Action you want to perform:
-
Install (arm64)
-
Start
-
Stop
-
Restart
-
Upgrade
-
View Logs
-
Backup Data
-
Exit Action [2]: 1
-
Enter
1as input
Starts the installation process
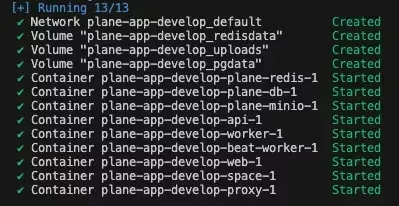
Be patient as it might take some time based on your download speed and system configuration. If all goes well, you must see something like this:
- This is the confirmation that all images were downloaded and the services are up and running.
This will create a folder plane-app and will download the docker-compose.yaml and plane.env files inside it.
- Enter
8to exit
This will create a folder plane-app and will download the docker-compose.yaml and plane.env` files inside it.
Setup the environment variables :
You can use any text editor to edit this file eg. nano, or vim
cd plane-app
nano plane.env
Below are the important keys you must refer to:
Update the environment variables to this :
- LISTEN_HTTP_PORT=8080
- LISTEN_HTTPS_PORT=443
- WEB_URL=http://localhost:8080
- CORS_ALLOWED_ORIGINS=http://localhost
Once you are done with change:
cd ..
# Run the shell file again
./setup.sh

Enter 2  # to run the app
Thats it,
You have successfully self-hosted the Plane instance.
And to stop it, just press 3
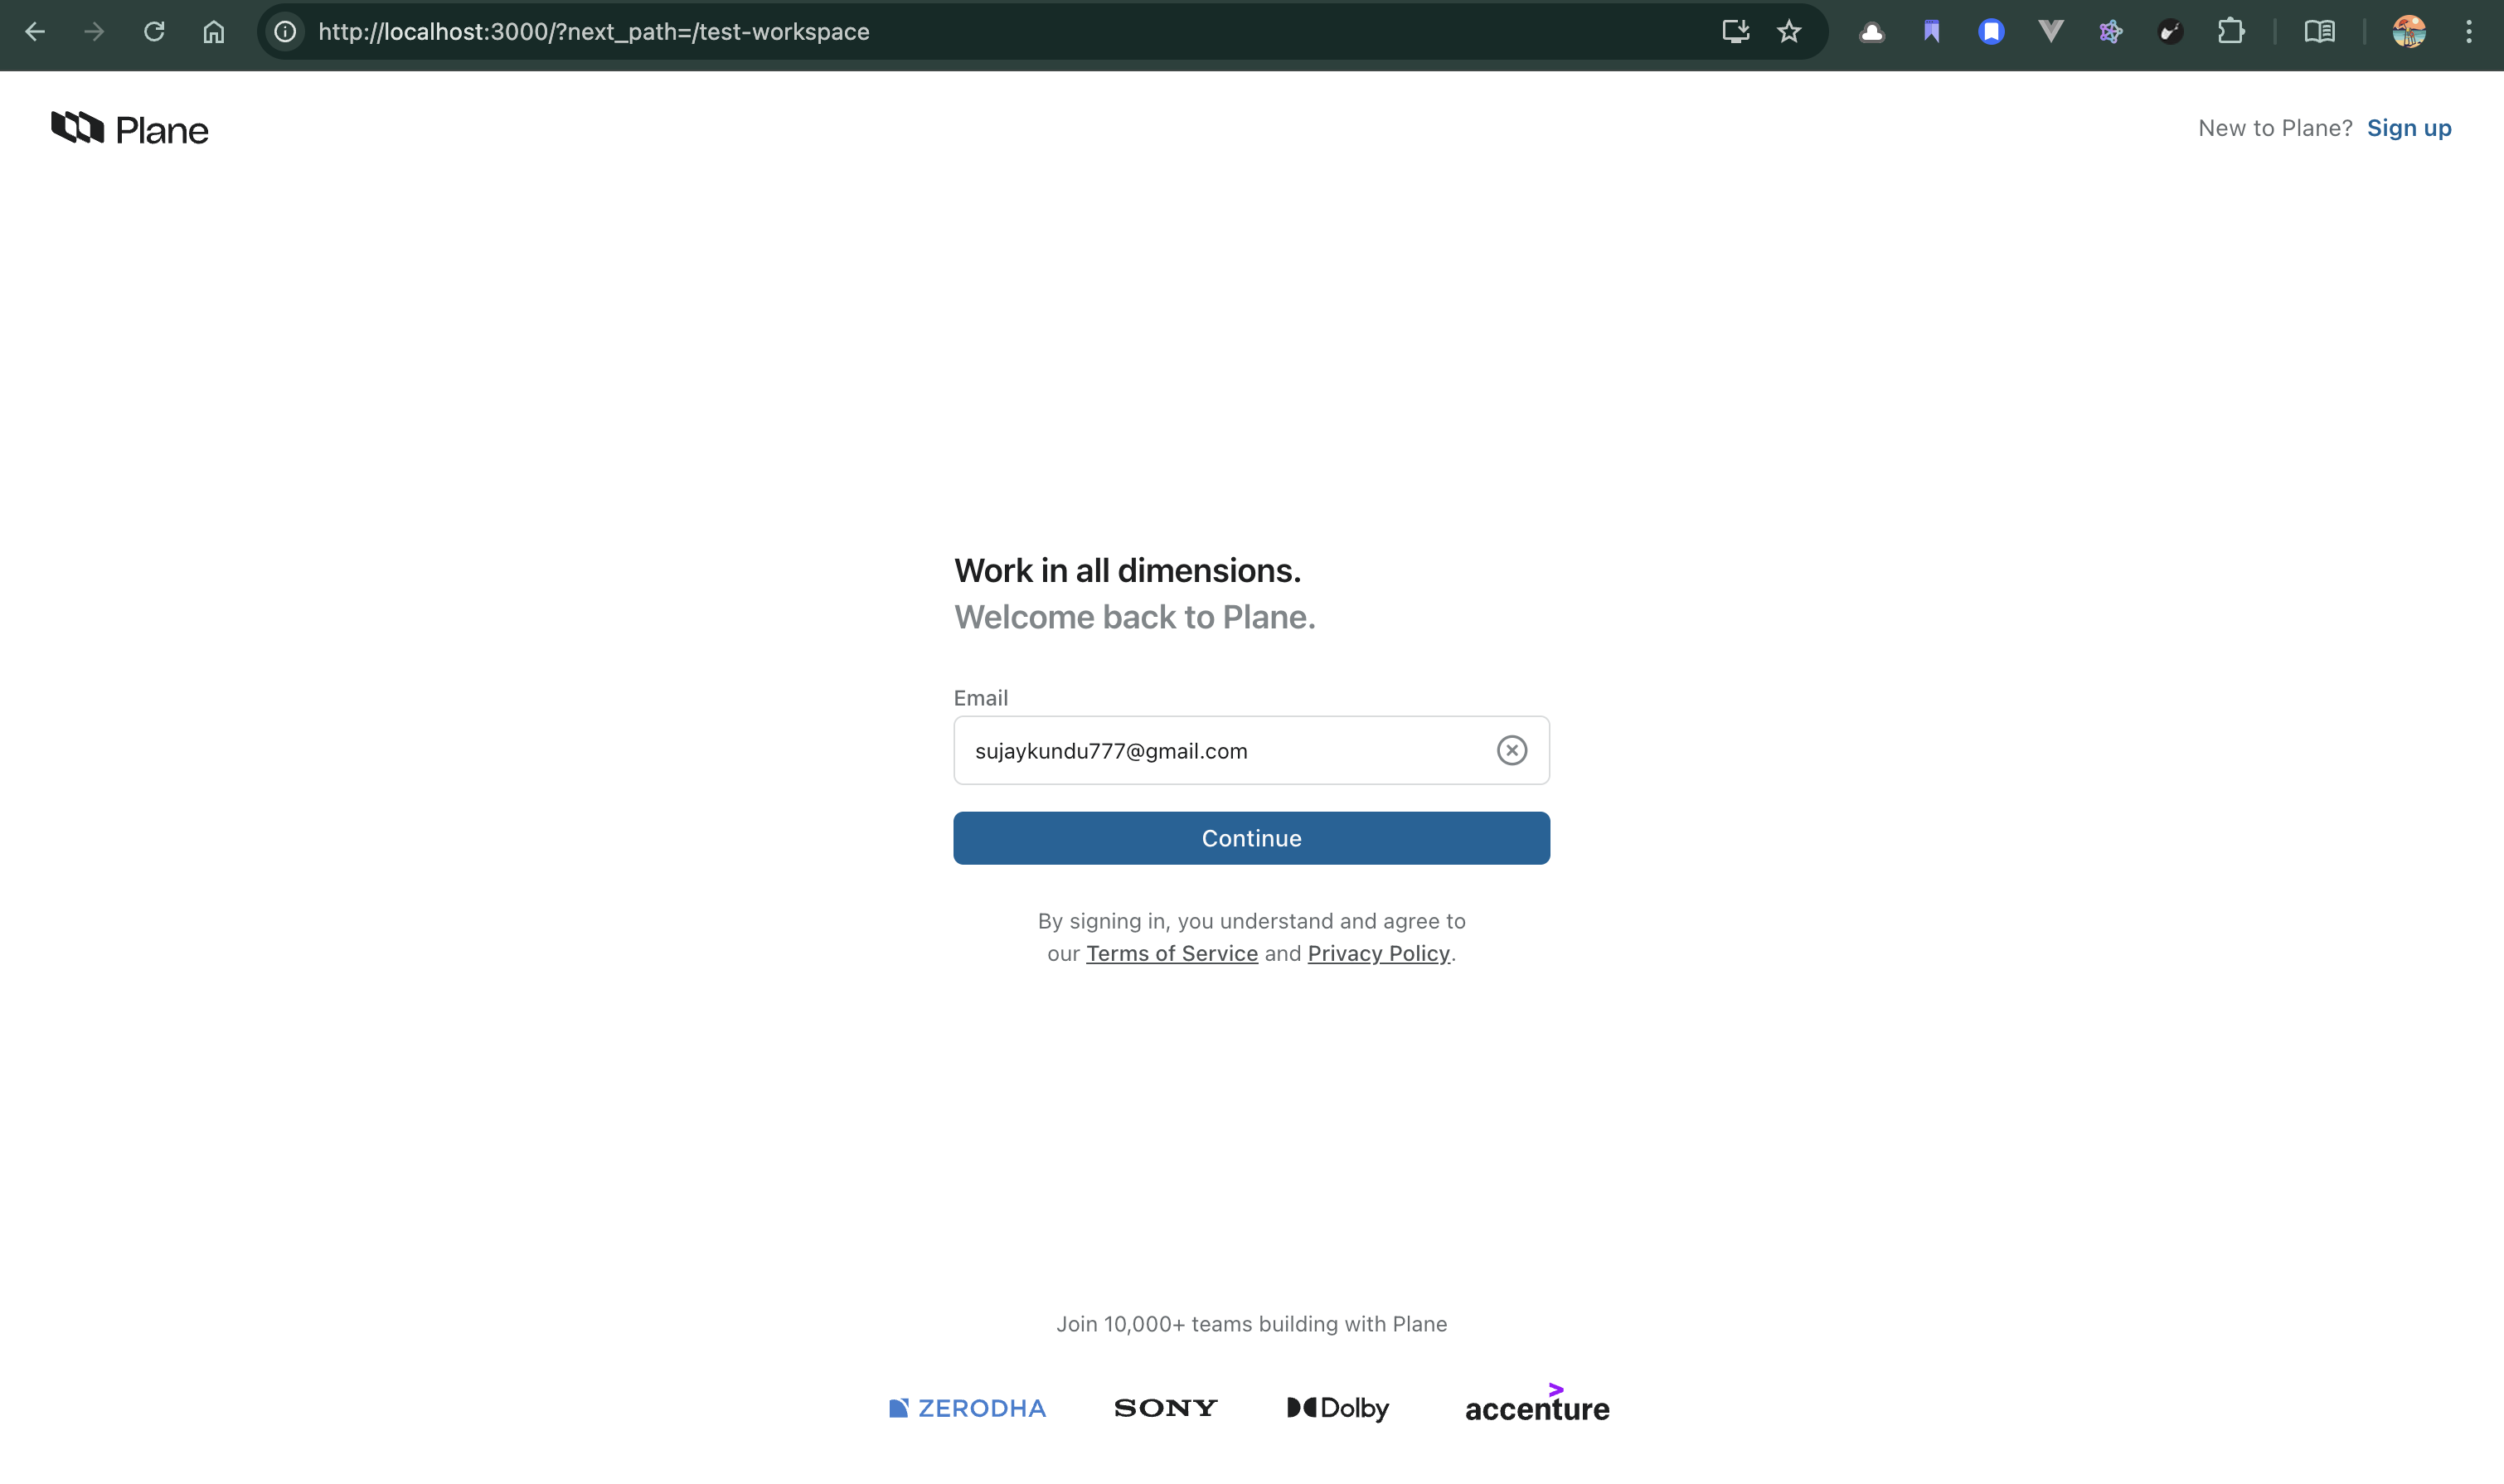
Access Plane
-
Frontend:
👉 http://localhost:3000 or your domain
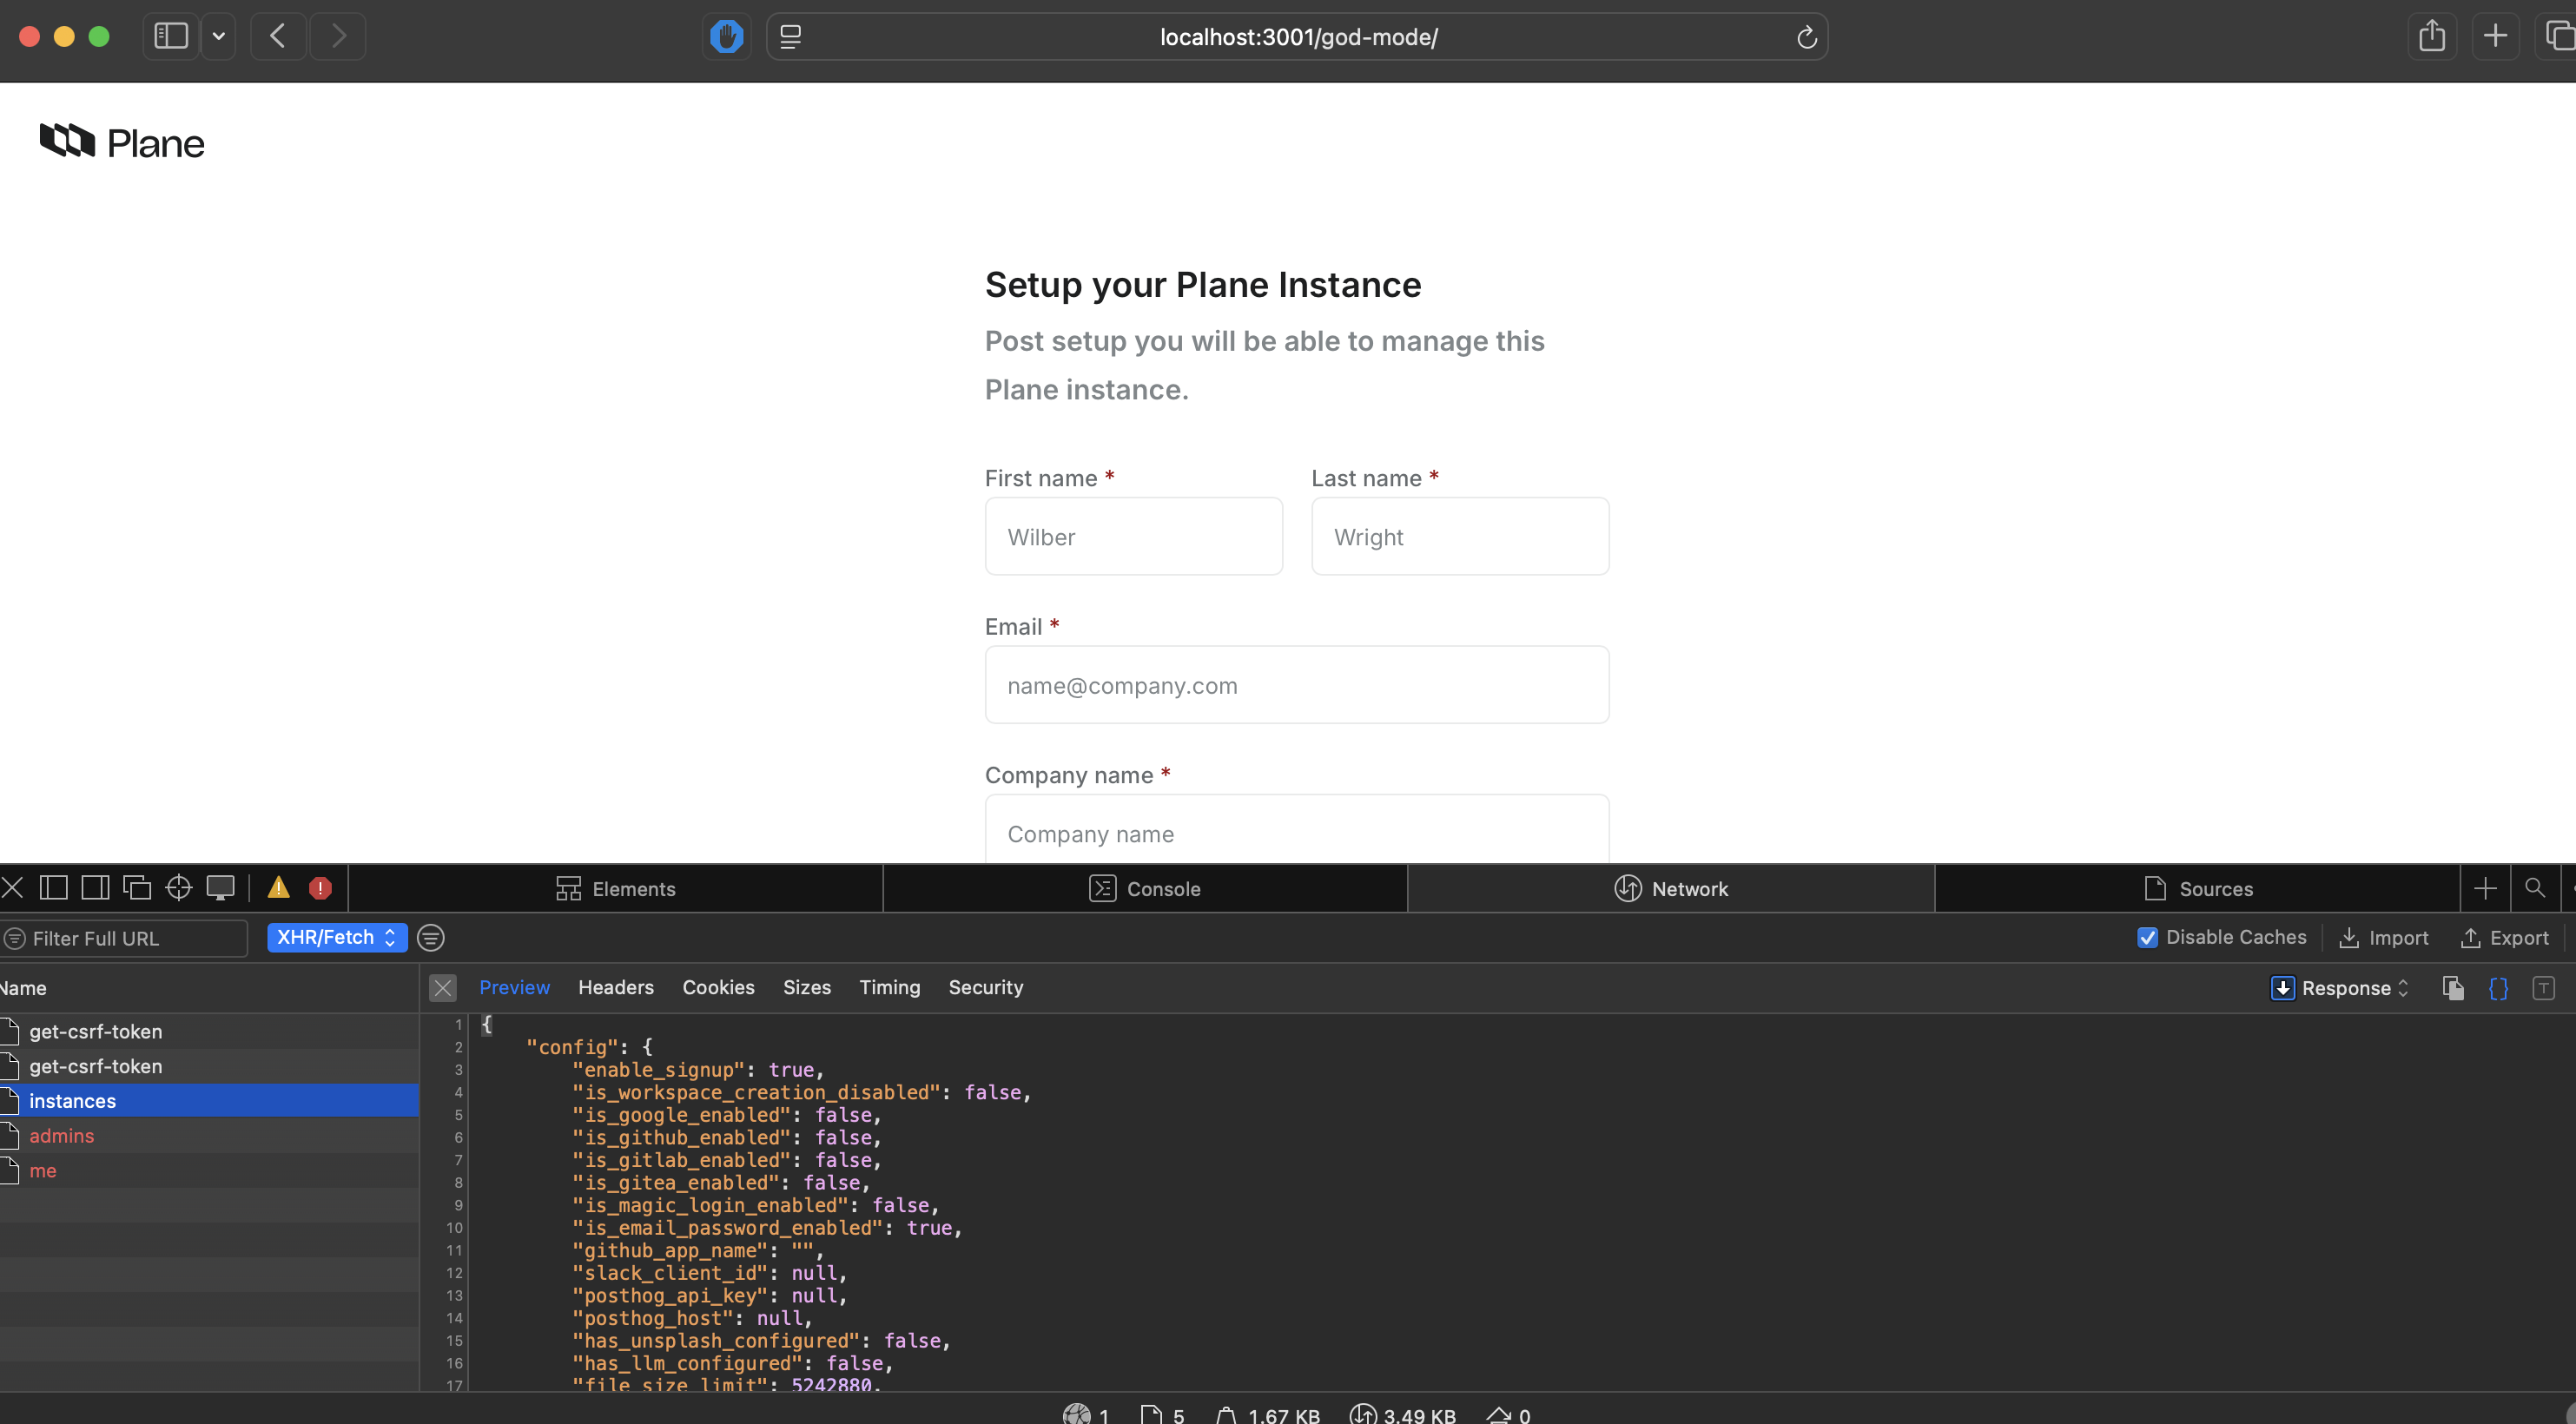
-
Admin panel (Django):
👉 http://localhost:8000/admin
Watch video tutorial
Fixing Error 400 Nginx
Increase nginx buffer
https://dev.to/devin-rosario/fixing-request-header-or-cookie-too-large-nginx-error-48fp
The "Request Header Or Cookie Too Large" error in a Plane (project management tool) Docker environment typically occurs when the HTTP request headers (often due to numerous or large cookies) exceed the default size limits of the web server (usually Nginx) used by Plane.
1. Solution for Plane Self-Hosted (Server Side)
If you are the administrator of the Plane instance, you must increase the allowed buffer size in the Nginx configuration within your Docker setup.
-
Modify Nginx Config: Find your
nginx.confor the specific site configuration file inside your Plane Docker volume or container. Add or update these directives in thehttporserverblock:Note:4 16kallows for 4 buffers of 16KB each, which is usually sufficient to handle large authentication cookies.nginx
client_header_buffer_size 1k; large_client_header_buffers 4 16k; -
Apply Changes: Restart the Nginx service or container for the changes to take effect:
bash
docker restart <plane-nginx-container-name>
2. Solution for Plane Users (Client Side)
If you are an end user of a Plane instance, the issue is likely caused by "cookie bloat" in your browser.
- Clear Browser Cookies: This is the most immediate fix.
- Chrome: Go to
Settings>Privacy and security>Third-party cookies>See all site data and permissions. Search for the Plane domain and click the trash icon. - Firefox: Go to
Settings>Privacy & Security>Cookies and Site Data>Manage Data. Search for the domain and clickRemove Selected.
- Chrome: Go to
- Use Incognito/Private Mode: Open Plane in a private window to verify if the issue persists without existing cookies.
- Check for Redirect Loops: Frequent redirects can cause headers to grow. Ensure the instance URL is correct and not caught in a loop.
Thanks, Do follow the series :)
In the next part, we will see on How to Customize Plane Locally and Create our own Docker Image